Pi Day 2018

Happy Pi Day!!!  So this was my FIRST Pi day with students as in past years we were usually on Spring Break.  But I can tell you it was EPIC!!  I hope this will inspire you to plan your own Pi Day!

If you want to get kids excited, you need engagement.  I ran Pi Day two different ways at two different schools.  Here are all of the details and resources!

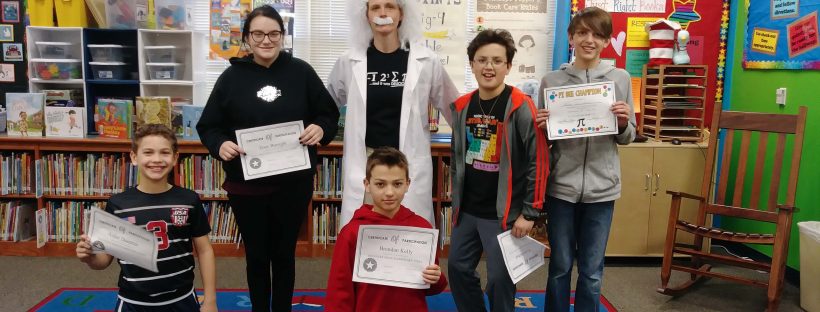
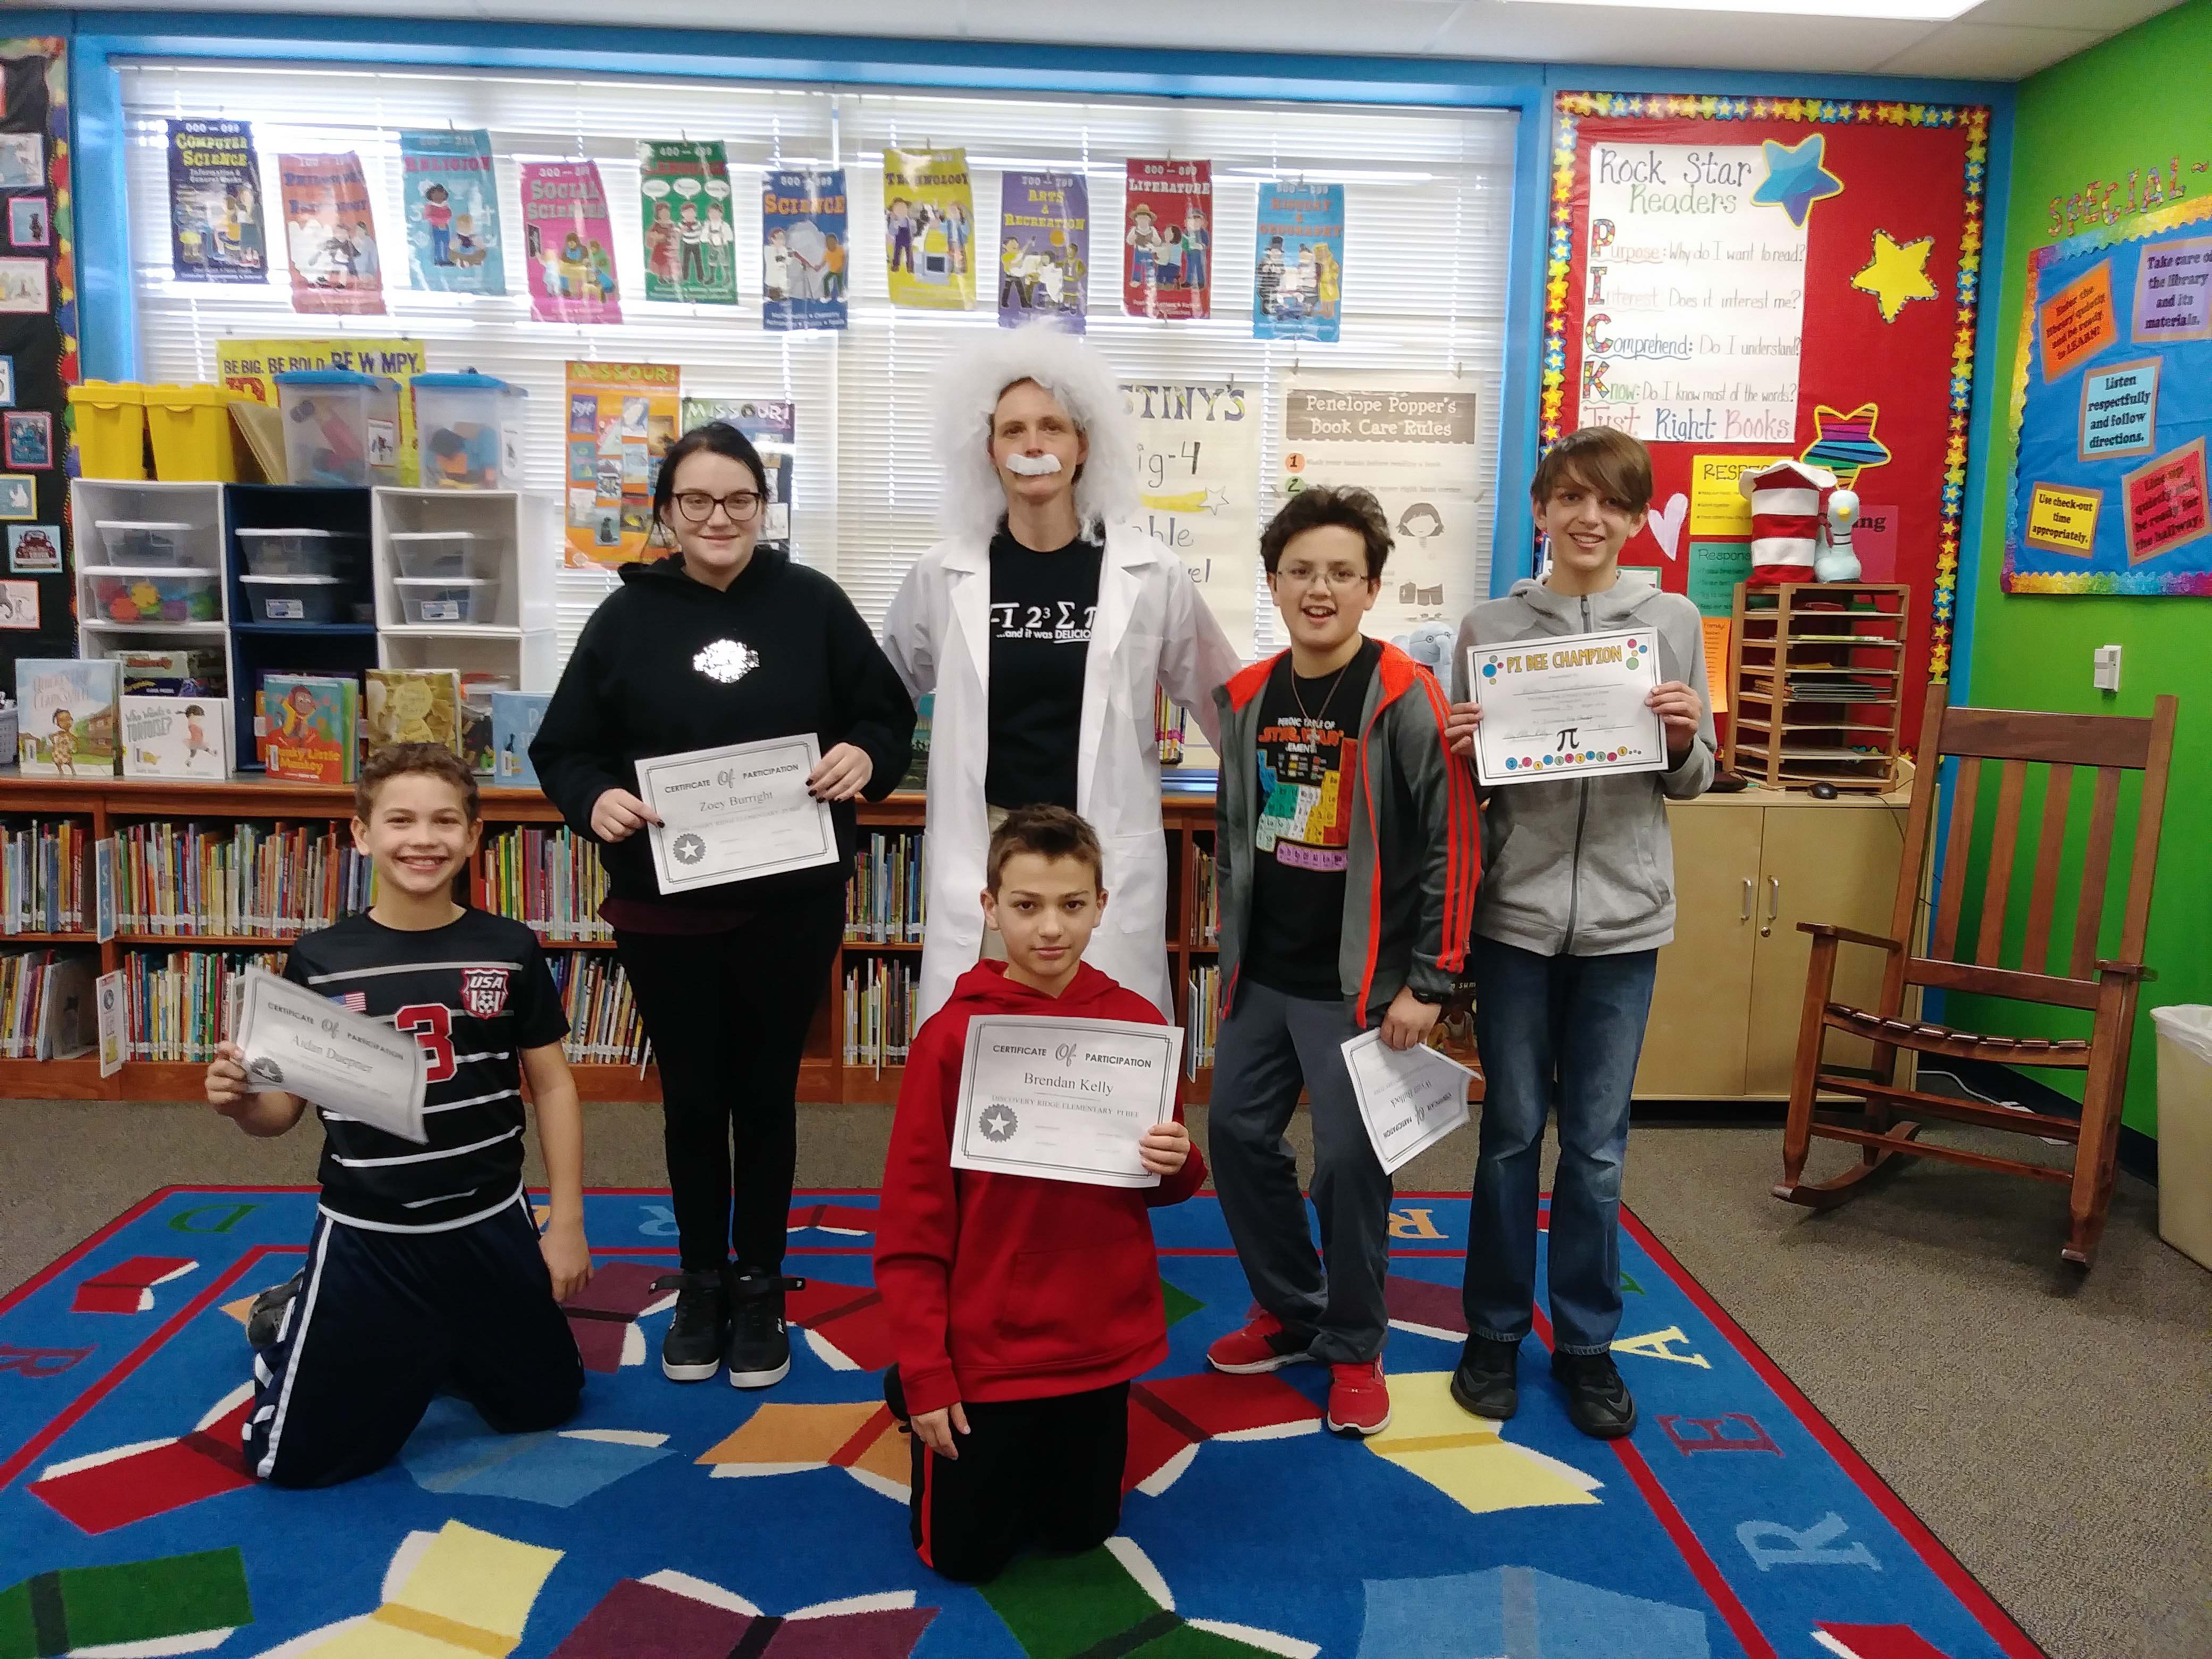
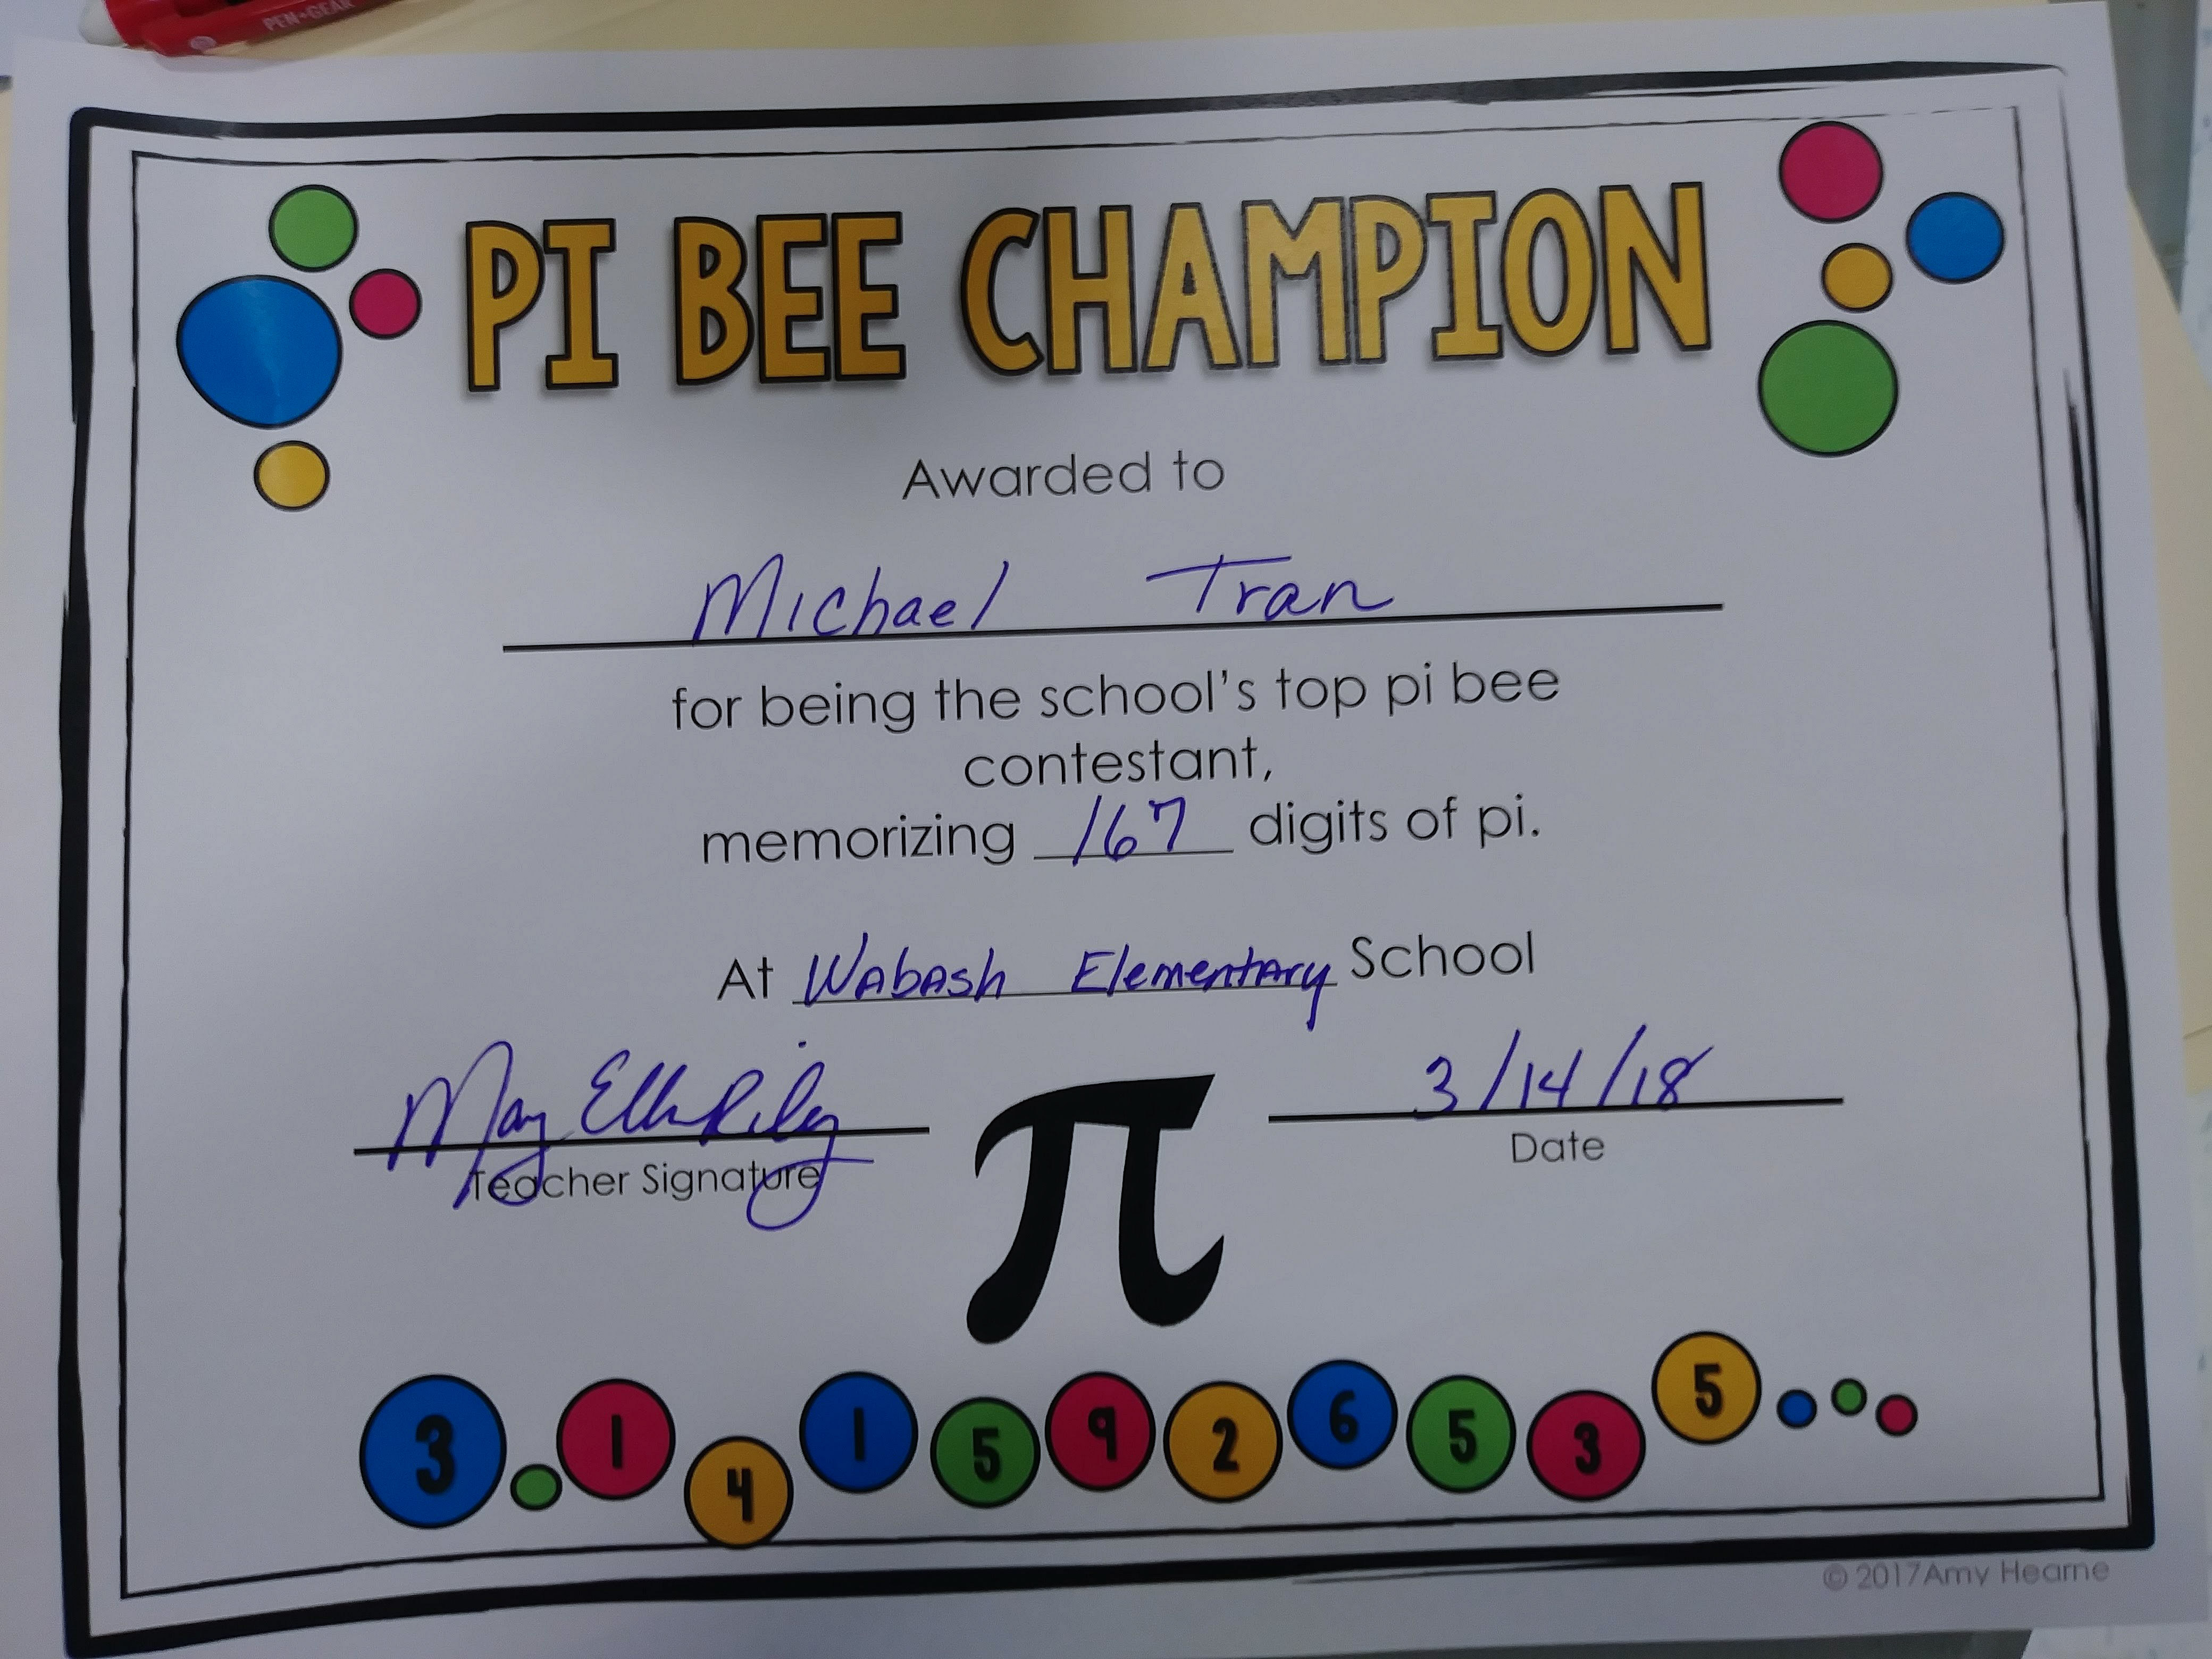
Two Months before Pi Day, the math teacher and I announced our first annual “Pi Bee”.  The person to memorize and recite the most digits of Pi accurately would win a prize.

One Month before Pi Day, I asked local pizza places for donations for the big event.  Mod Pizza in Wentzville donated $25 in gift cards for the winners.

I confirmed where we could hold the pi day in the school building and the time.

Two weeks before Pi day, I collected Pie Face games from parents and staff.  I purchased a white crazy scientist wig and lab coat from Amazon.  I plan to use them in my STEM Camp this summer as well, so I think it was a worthwhile investment.  The wig was surprisingly good for the price however it is on the small side.  The coat is a normal fit – so if you are normally a medium then get that size.

I also had parents sign up to bring in whipped cream, plates and gummy bears.  We had extra gummy bears and will use them throughout the year.  I asked a couple of parents to help set up as well.  This was a big help at the beginning and end of the event.

I asked the art teacher if I could borrow a class set of markers or colored pencils.

I purchased and collected and copied additional materials for Pi Day.  I had decorations and activities from last year.  This year I added on a few more stations.

I printed and laminated Pi Day Decorations in preparation for the big day.  These are my favorite – and FREE!

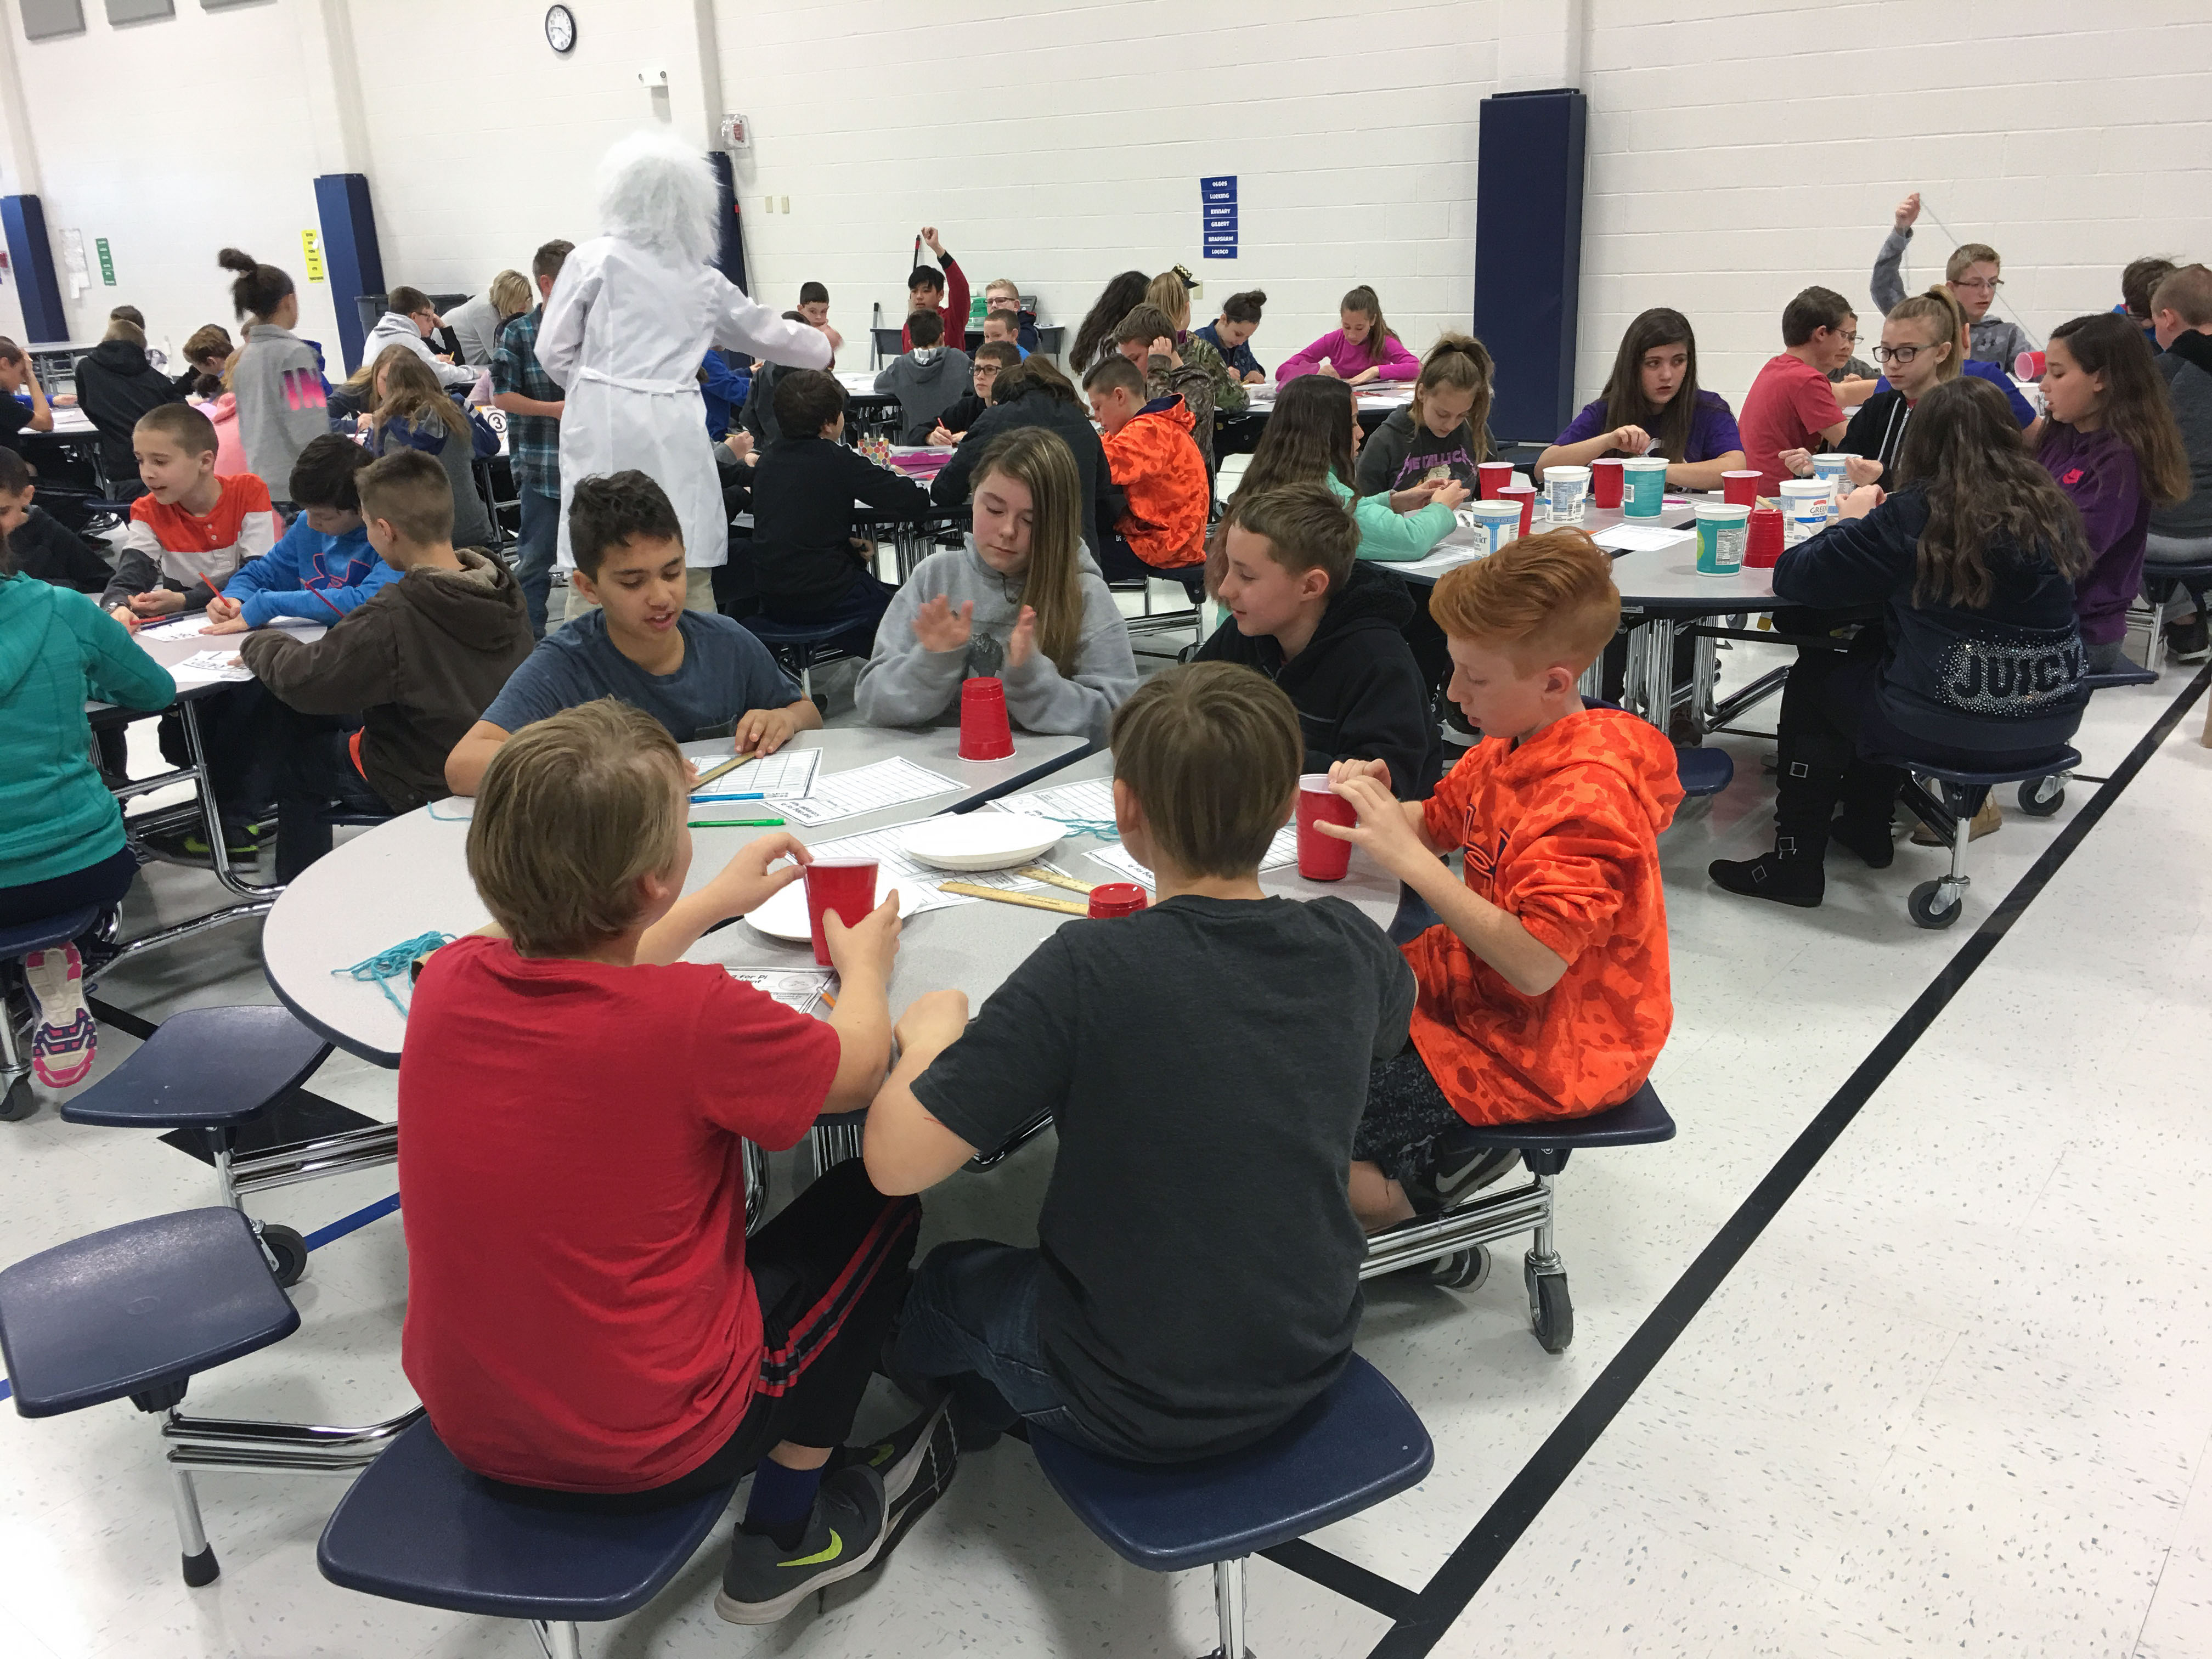
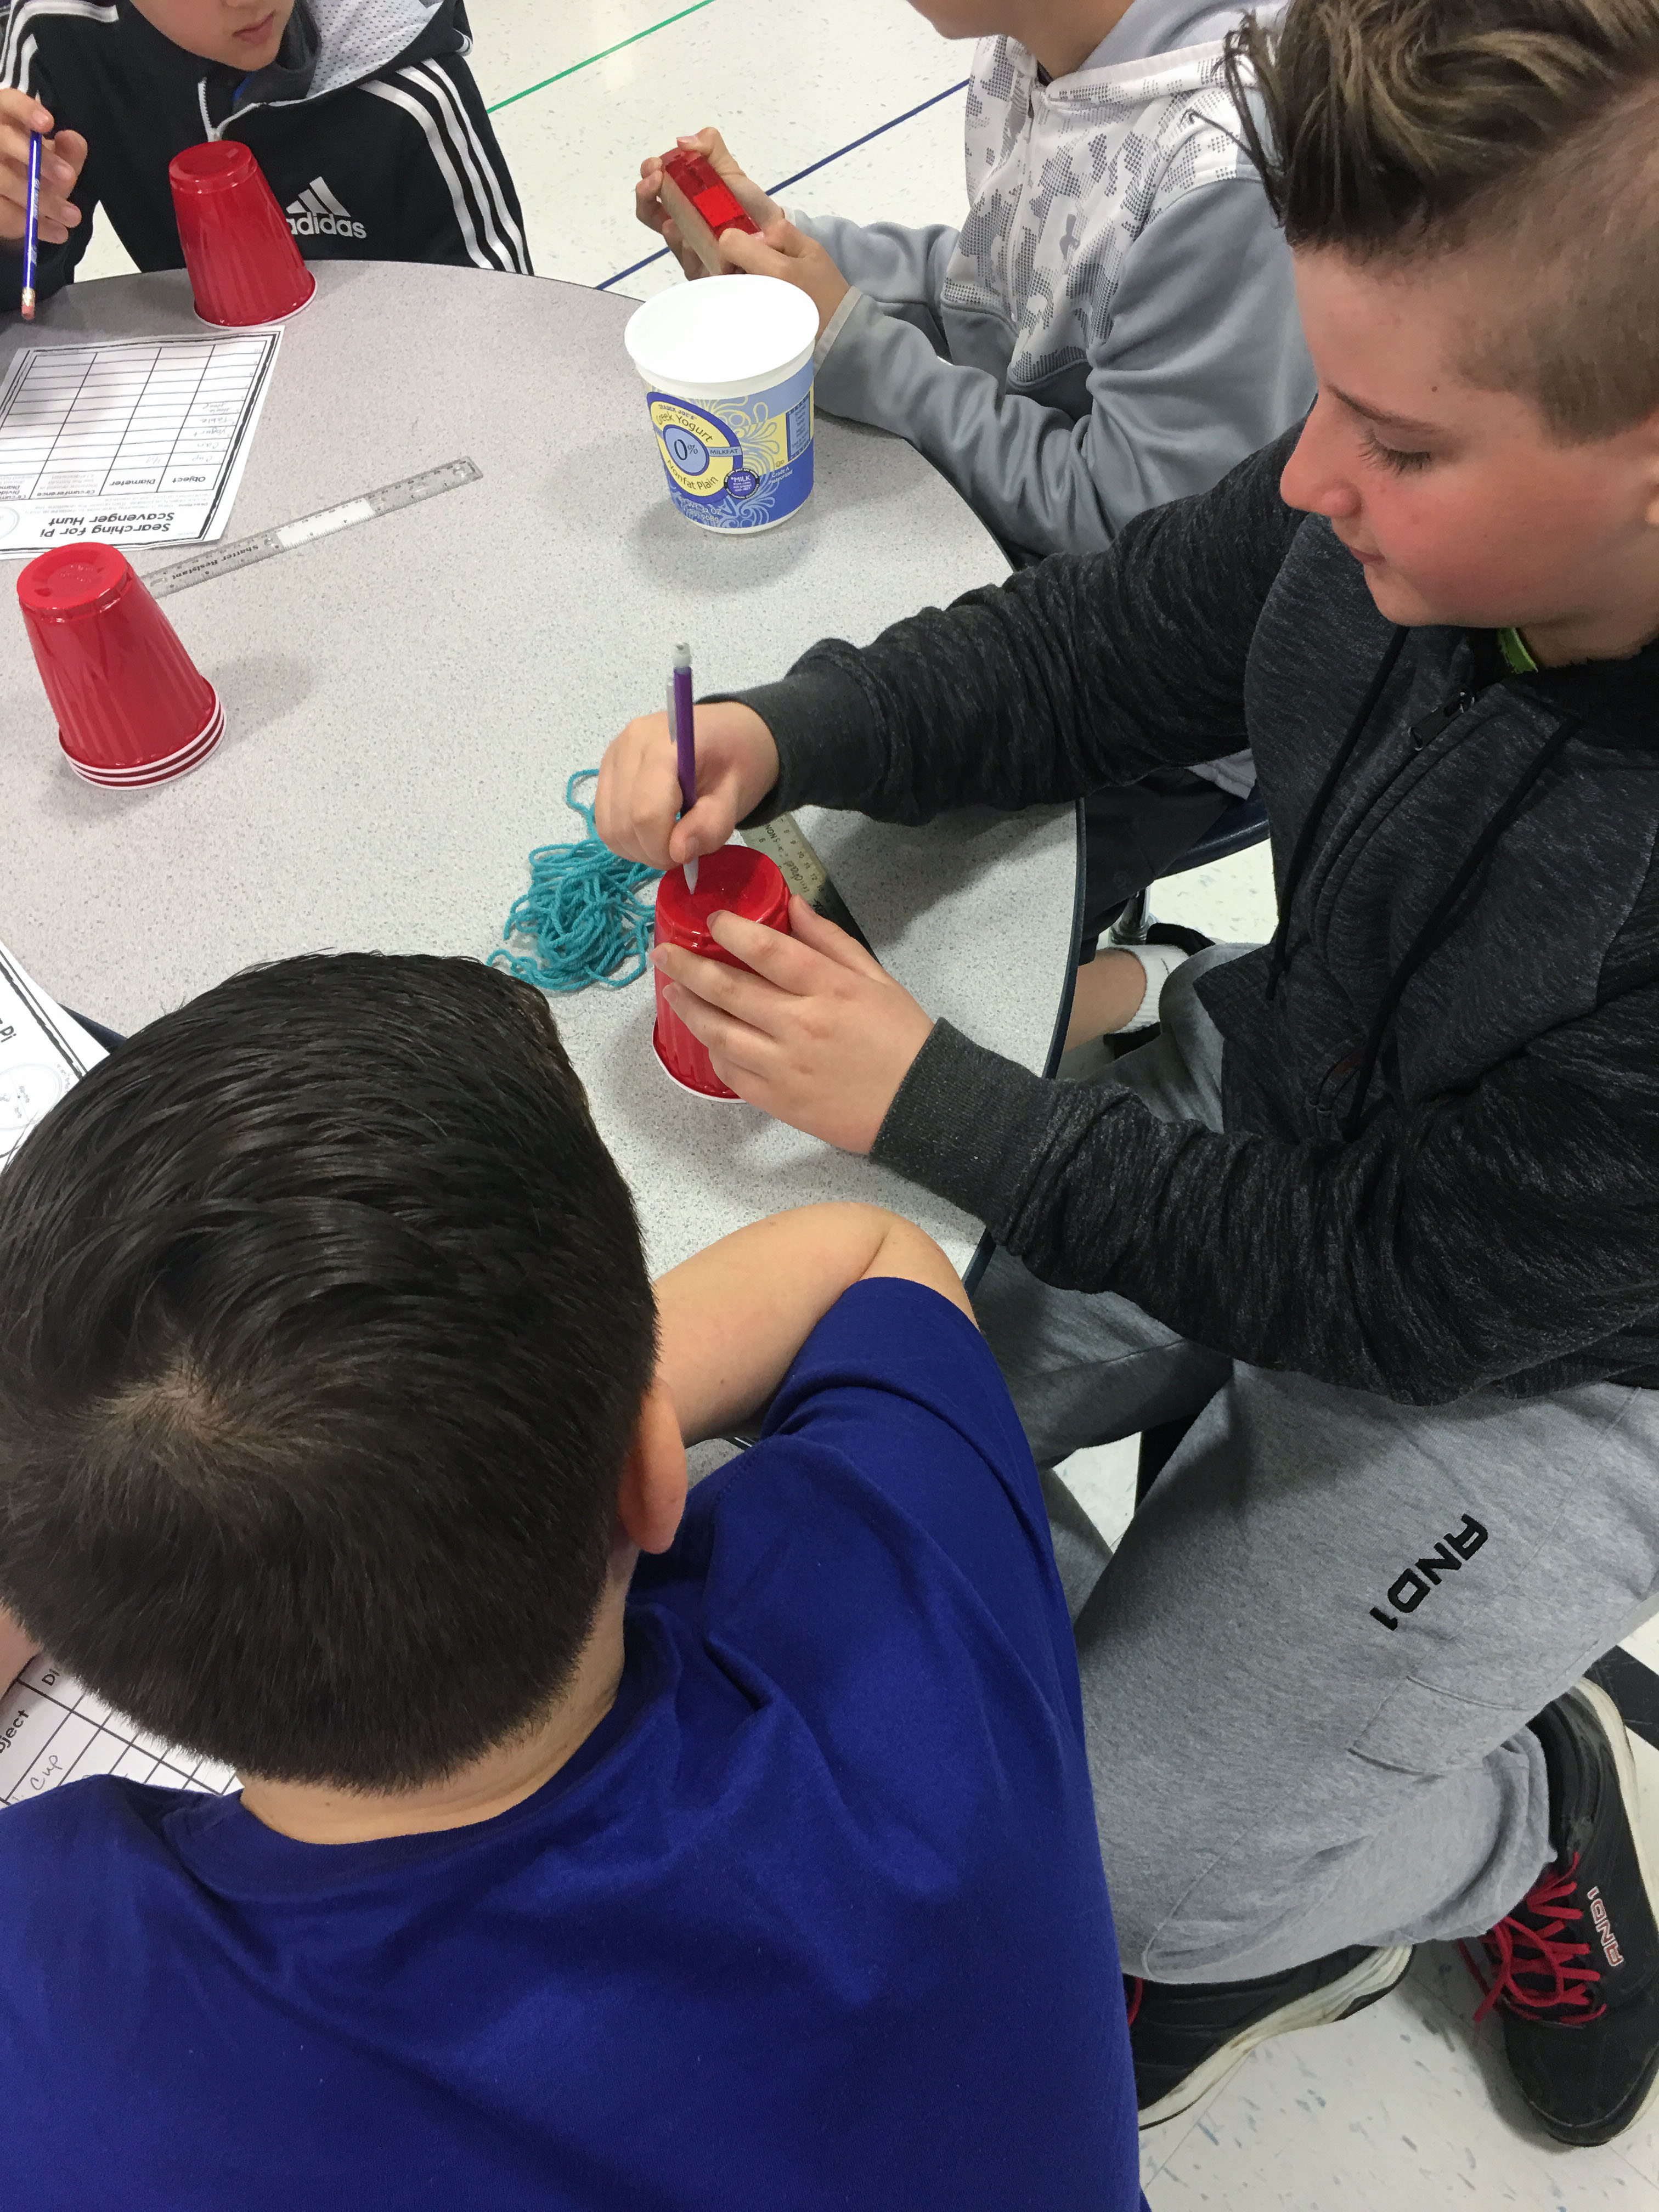
I collected string, rulers, cans, tubes, yogurt cups and anything else round for Pi Investigation Station.  I would advise NOT using paper with circles drawn on them.  It is very difficult and cumbersome.  It is simpler to keep your toilet paper tubes!

I asked any staff members free during first hour to come and join the pi day fun.  They would also get their faces full of pie 🙂

Activities I used included:

Pi Day Art Poster – this station has the students coloring different posters which will form one large poster.

Pi Bee Certificate and Stations – This set included a pi bee certificate which I gave to each of the winners.  I work at two different schools, so I had two 1st place winners.  There are activities I used as well.

Pi Day Word Station – I included various word searches that I found online.

More Pi Day Actvities for Stations:

No Prep Pi Day Activities: Includes another word search

Graphing and Coloring:  includes a bar graph activity and art activity

Poster:  Free poster

Pi Day Extensions:

For my gifted education class, I used a Pi Day breakout where the students had to solve puzzles and use pi to figure out the locks.  All of the materials are in the shared folder here.

Pi Day Breakout

The Day is Here!!!

Pi Day finally had arrived!  Here is how our day went so you can have your own pi day too!

  1.  Pi Day Slideshow
  2. Introduced Albert Einstein and who he was and why the day was so special.  Introduced what pi actually is and had it up on the large projector.
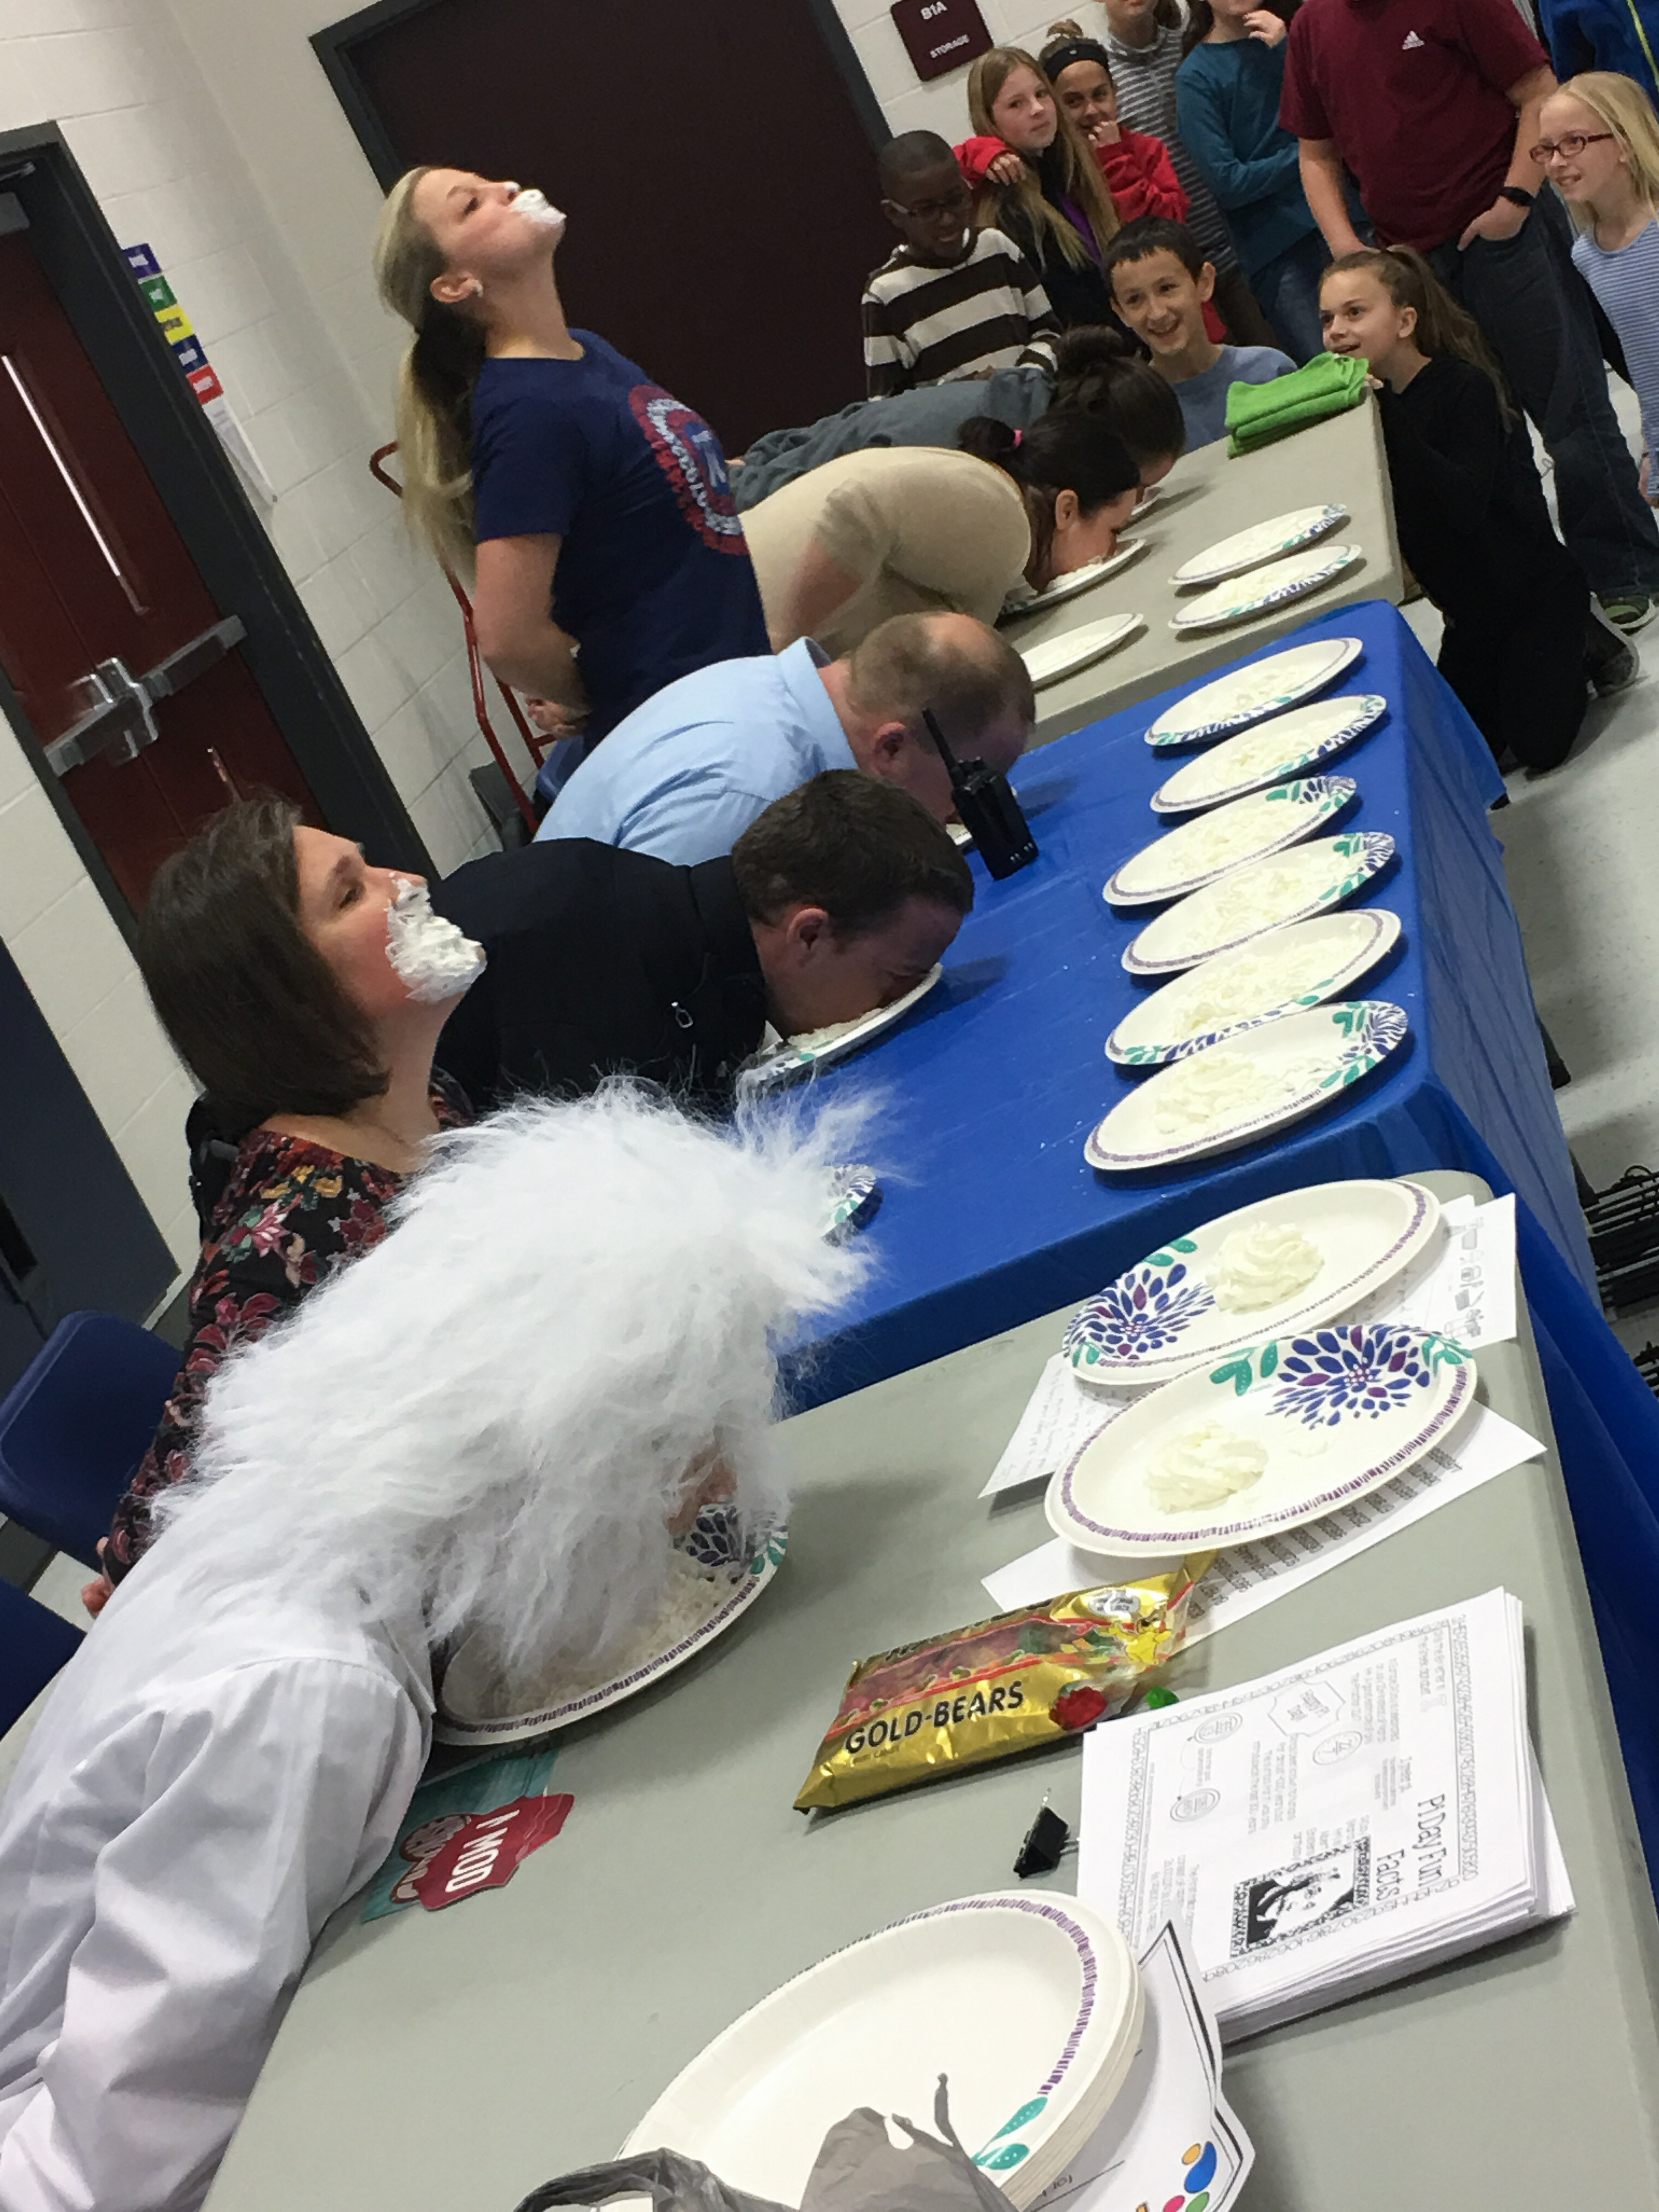
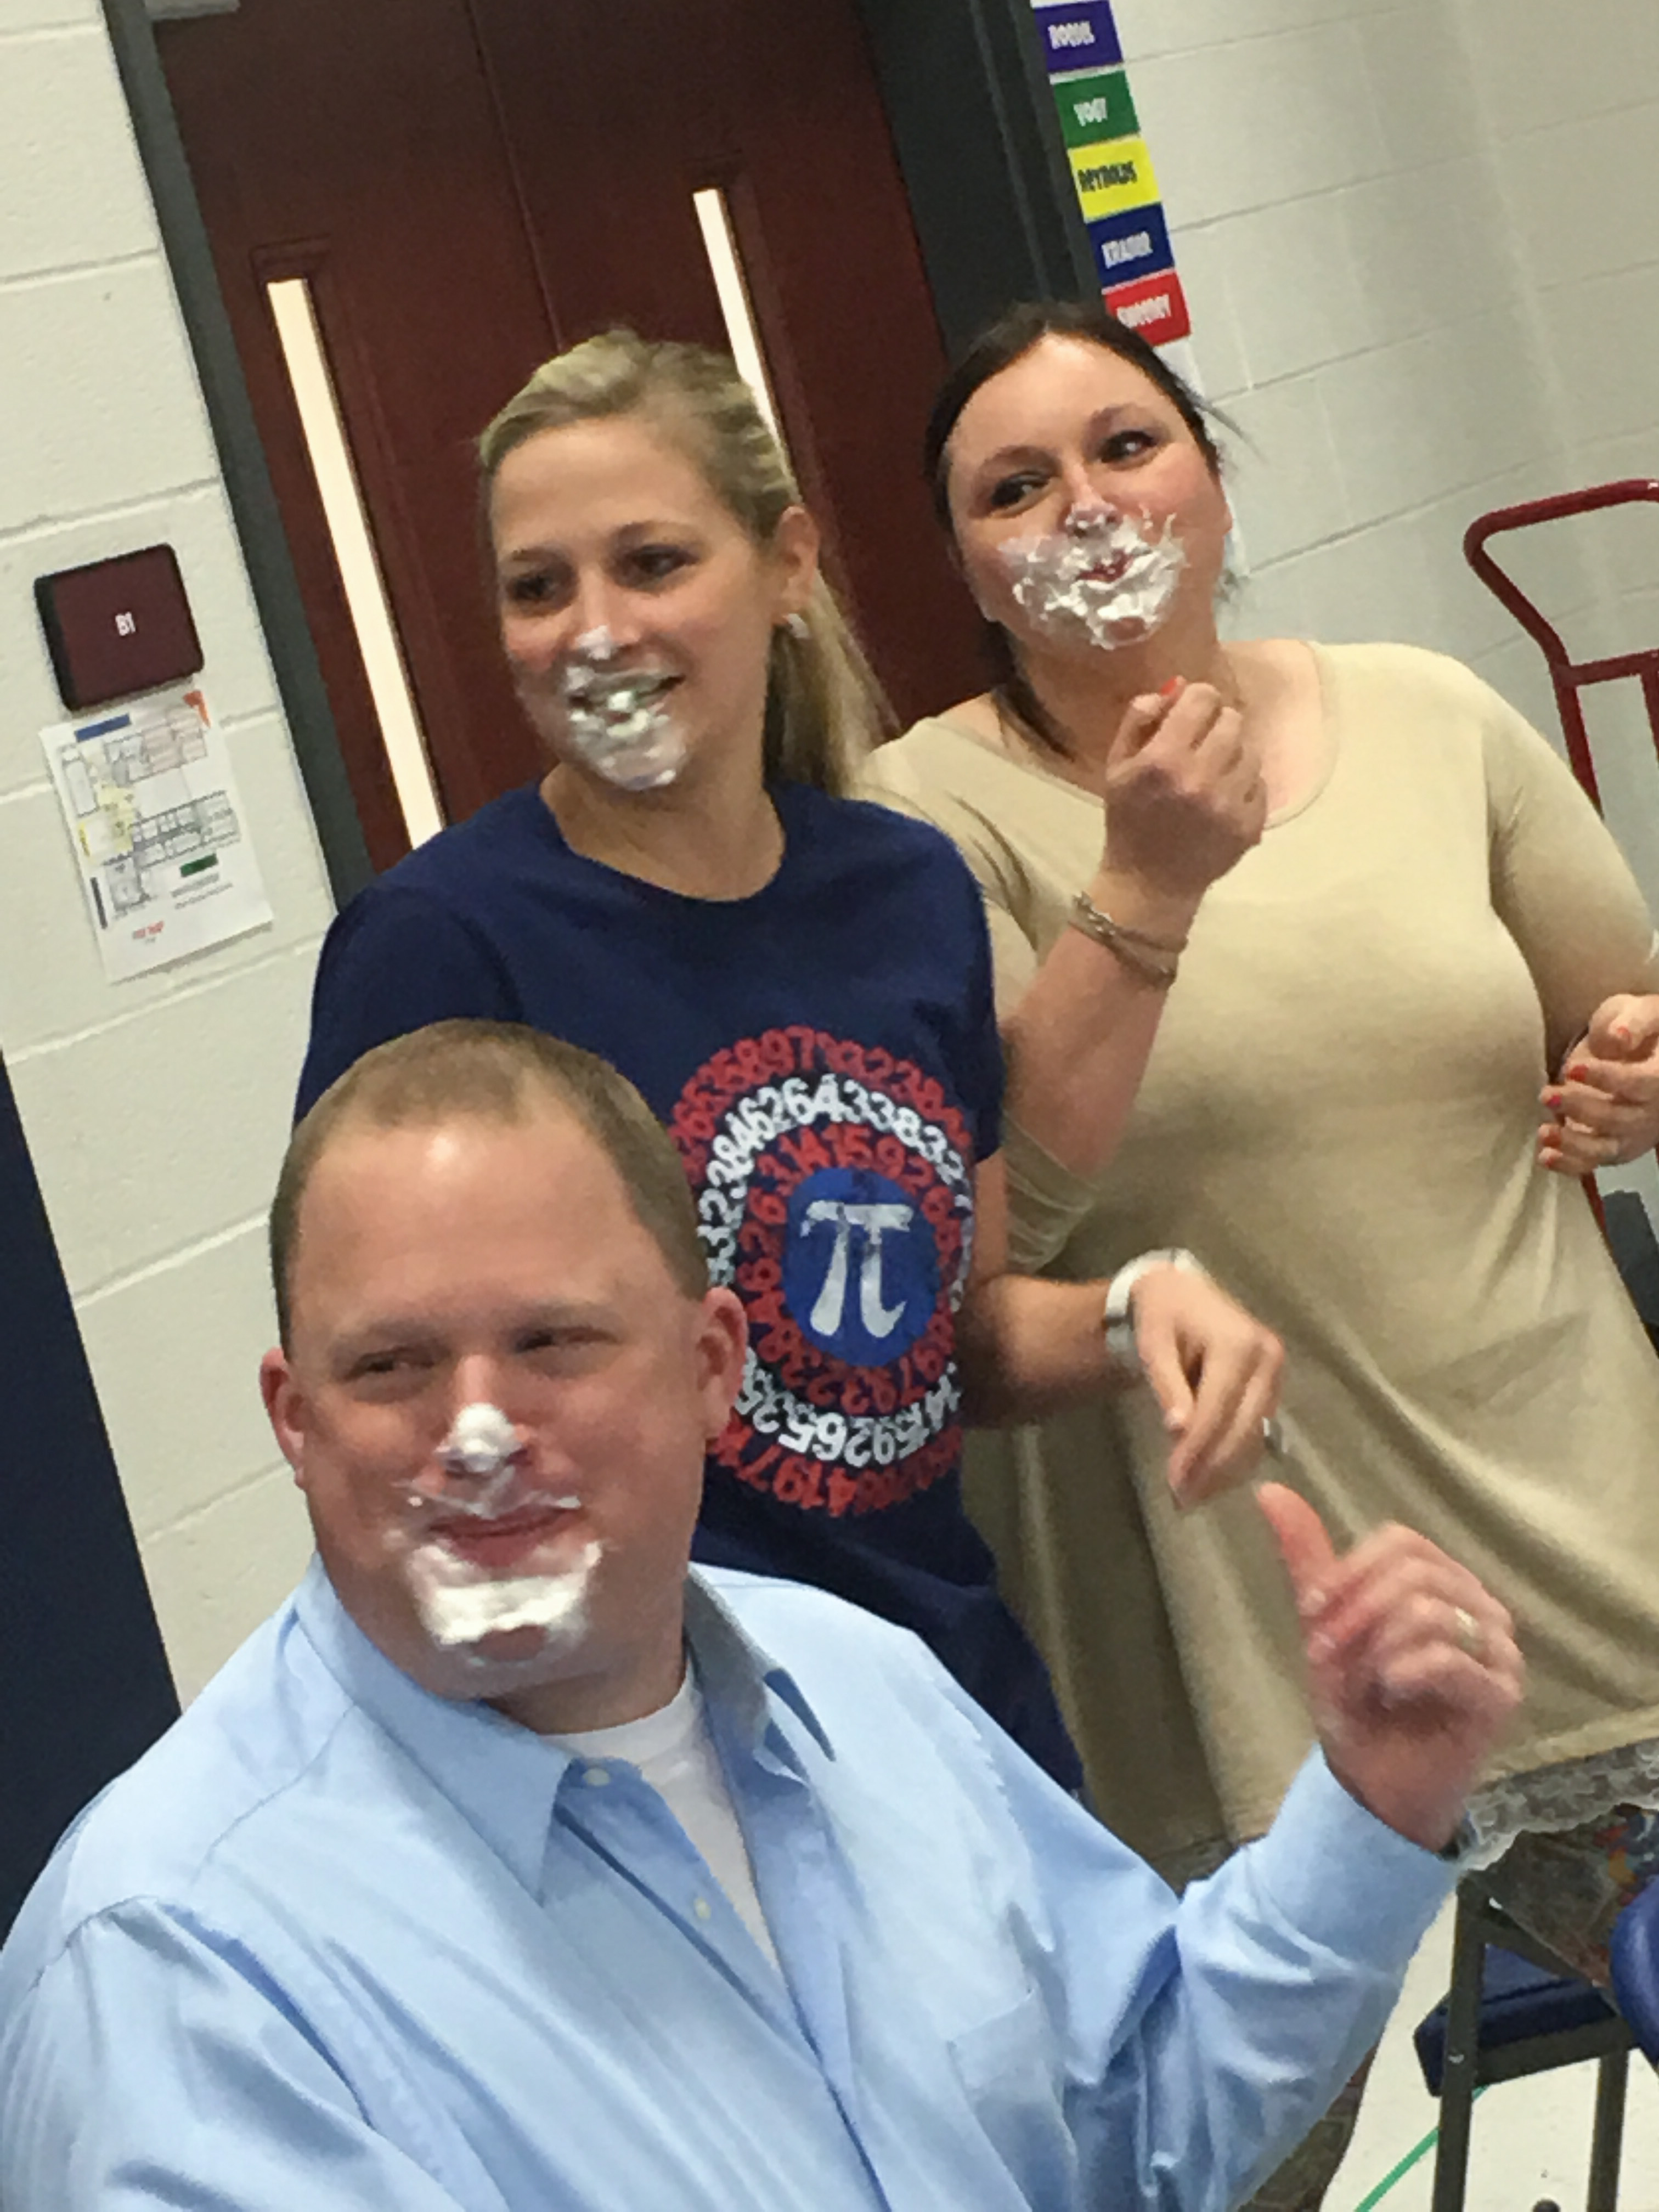
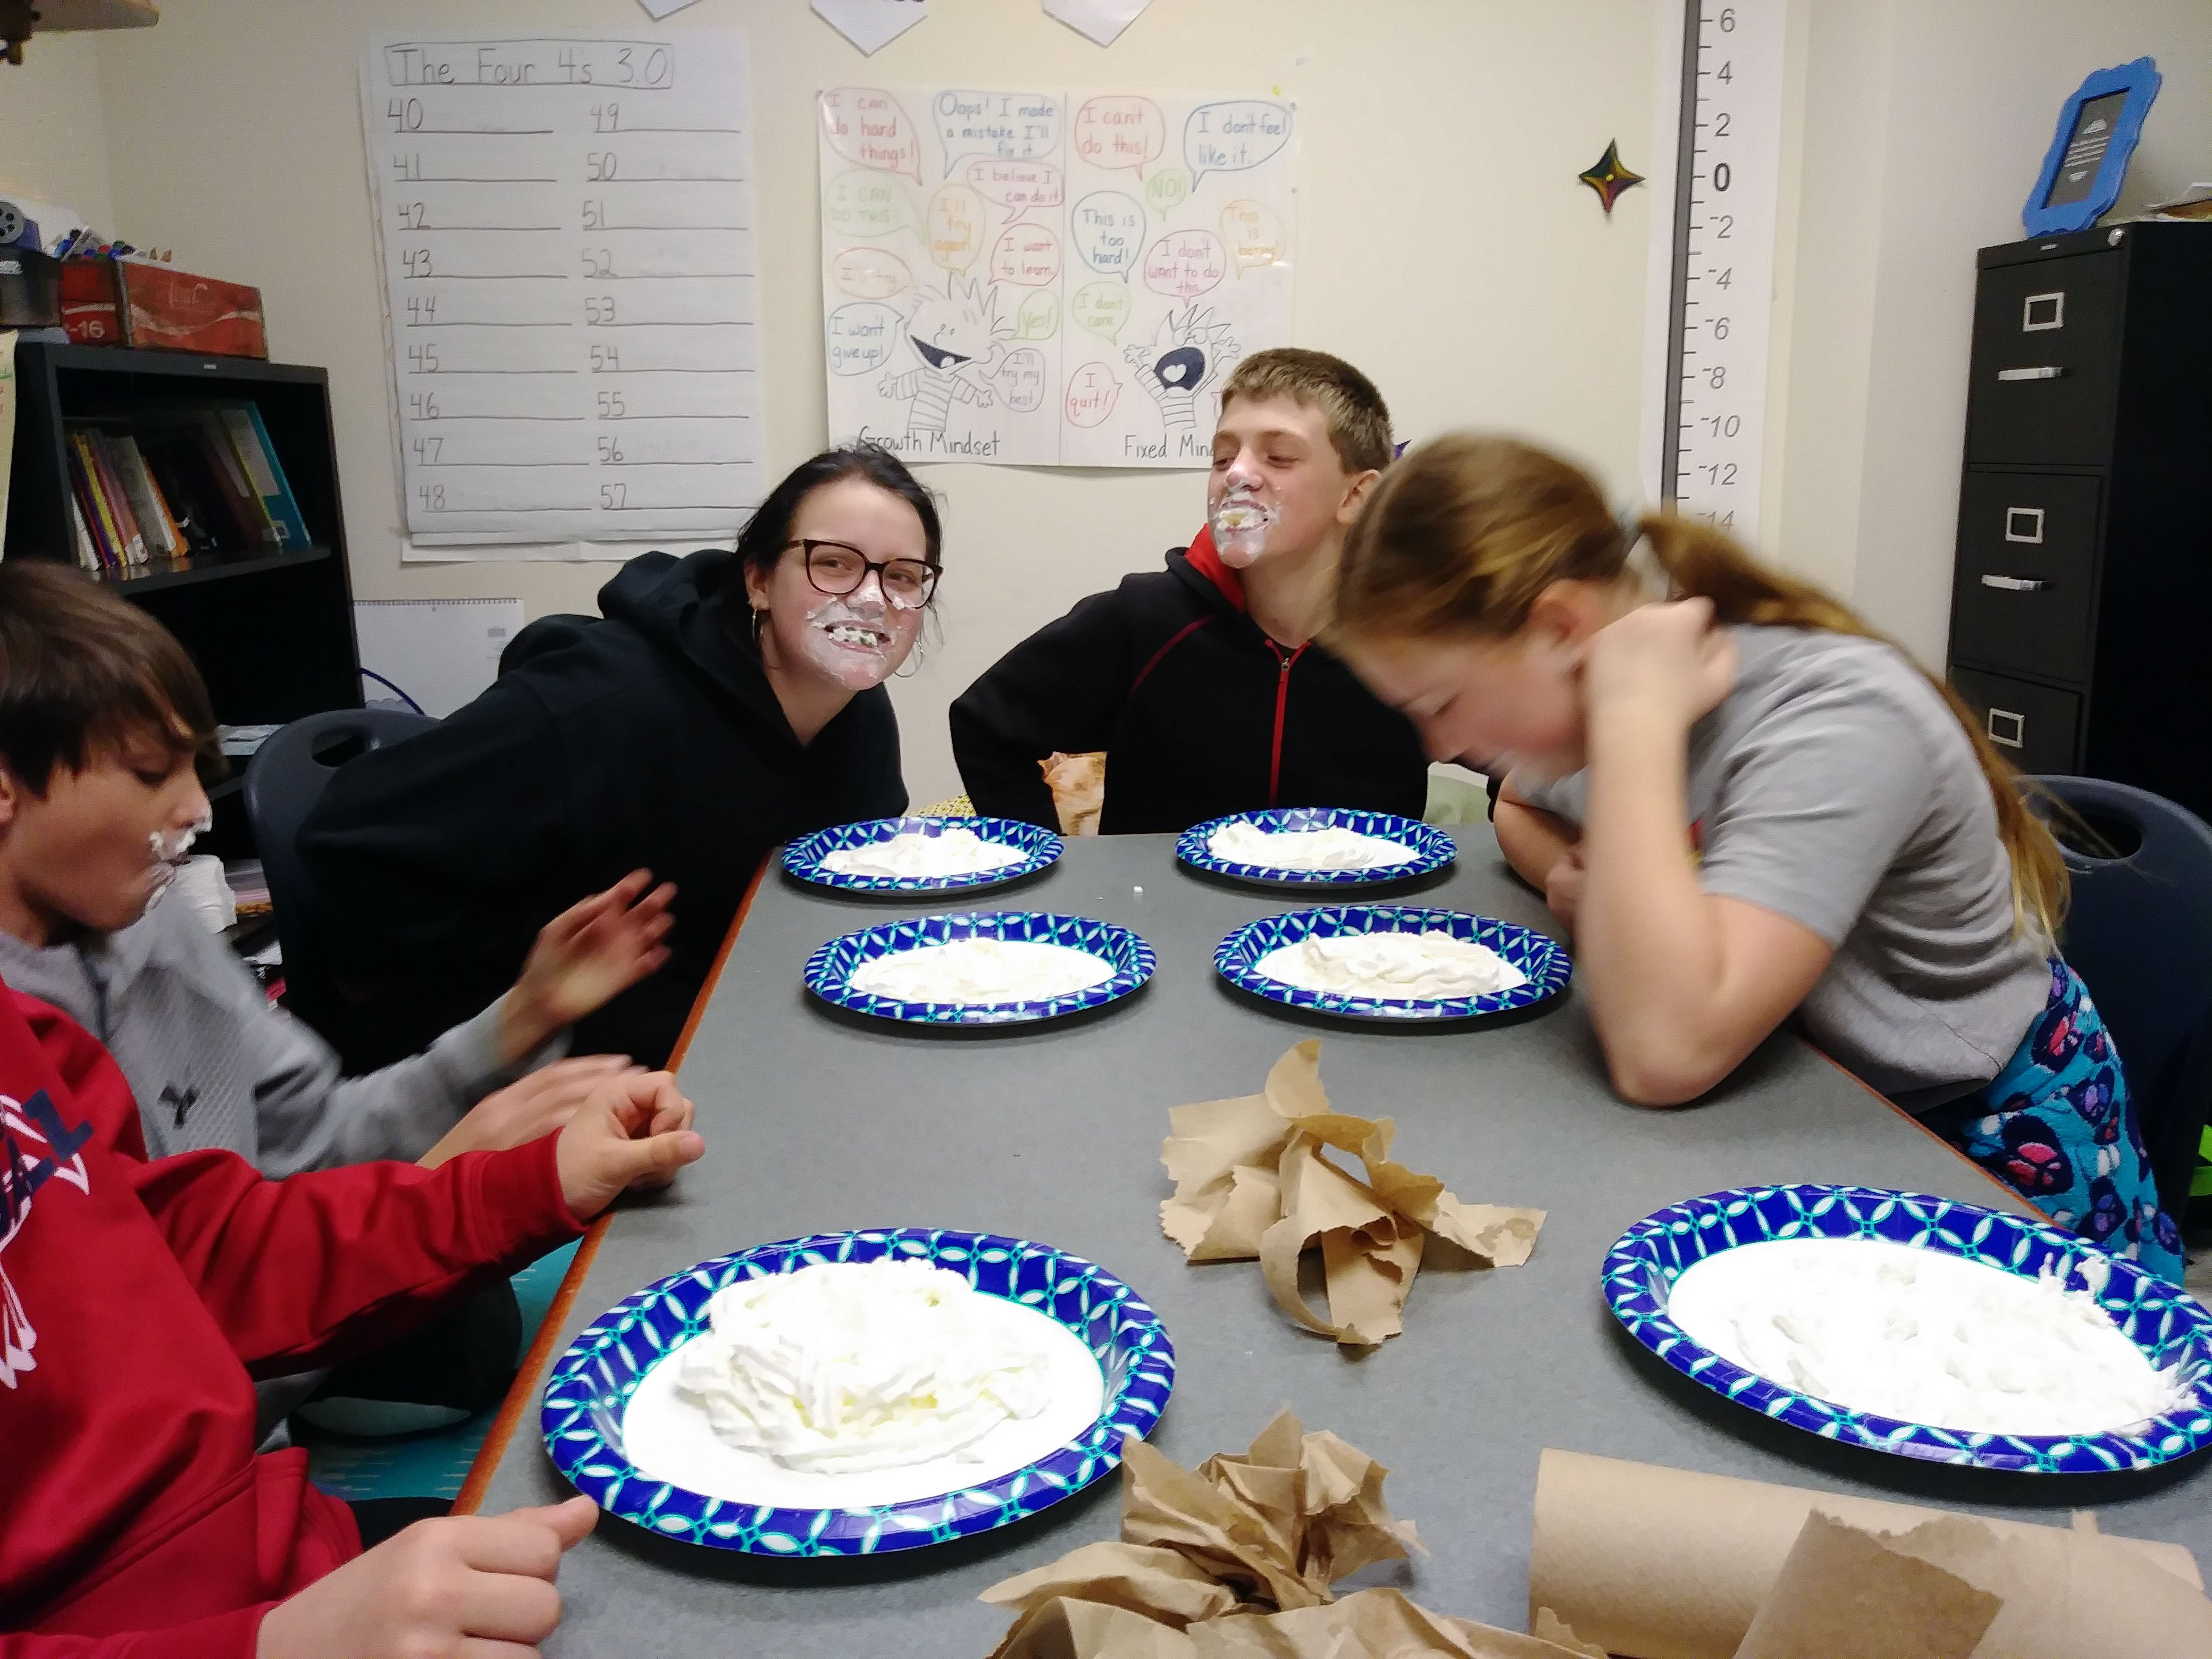
  3. Pie Contest!!  This can go first or last.  We had paper plates with one gummy bear in each.  Then the plates were covered in whipped cream.  The staff members and I had to find the gummy bear and show everyone first – withOUT using your hands!!
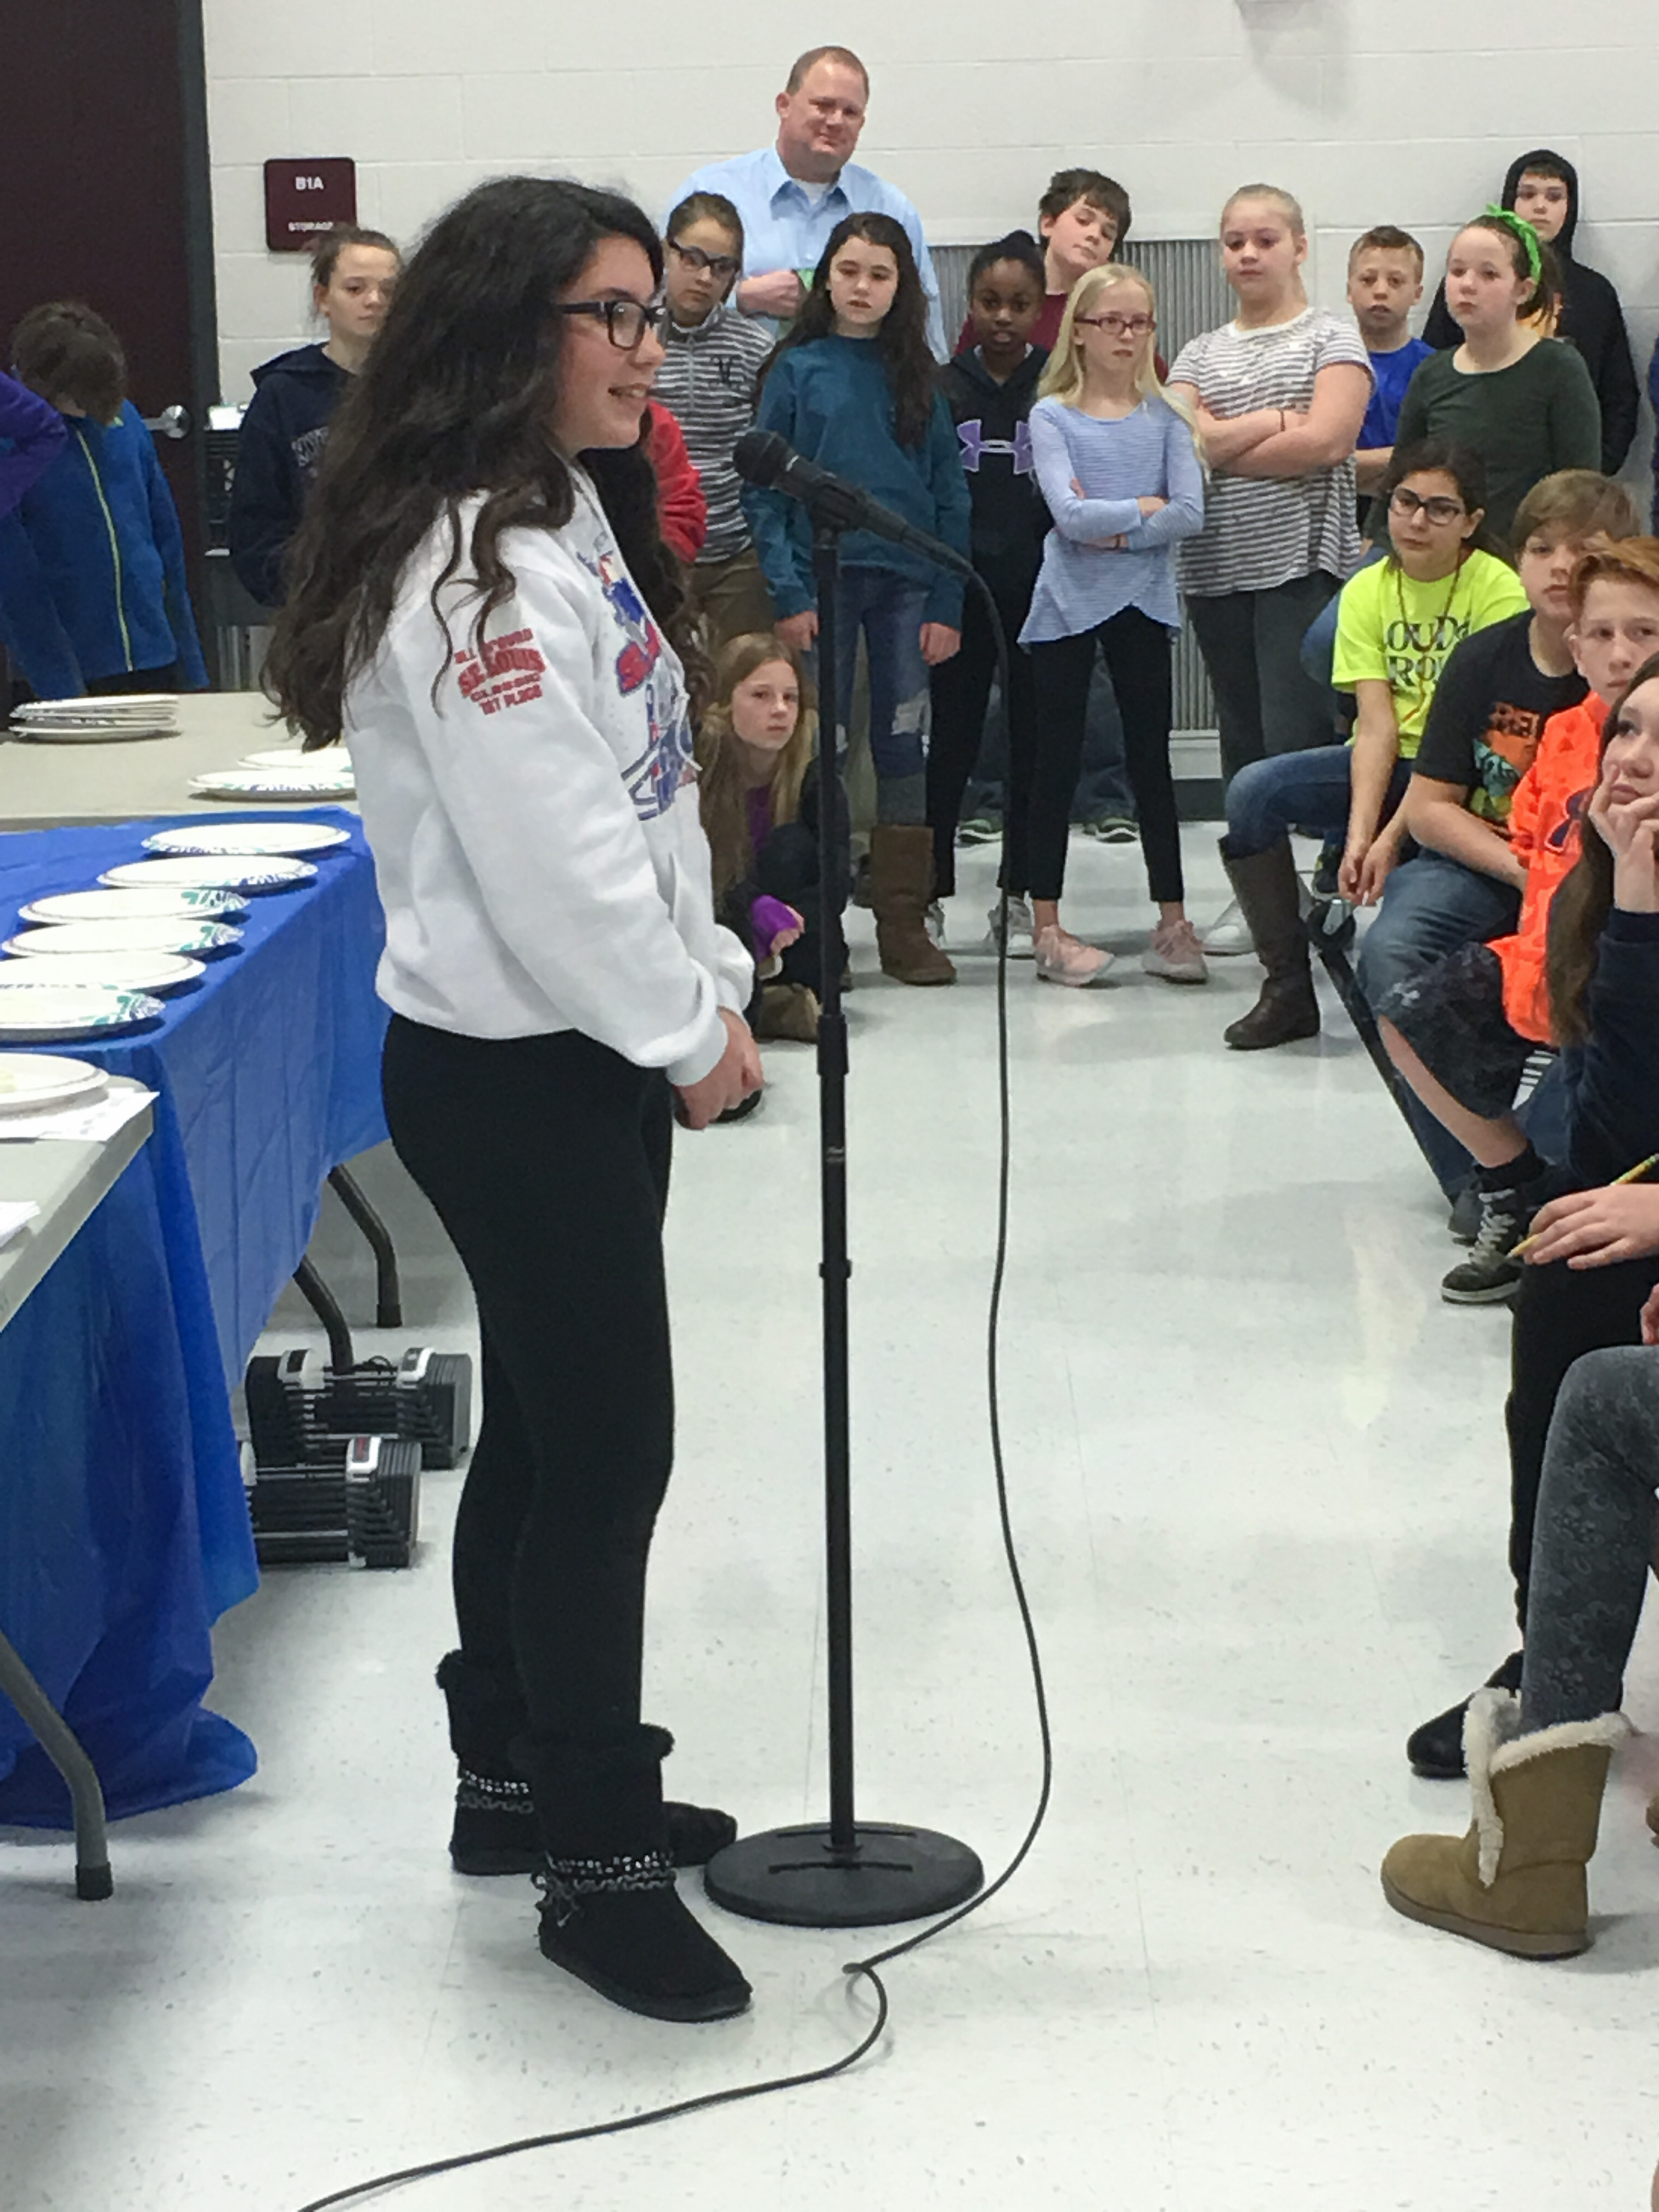
  4. Pi Bee – contestants came up and gave the digits of pi.  This part will go by much faster than you think!  I had two of us judging so it would be fair in case there was a close call.
  5. The pi bee winner was announced and given his or her certificate and prize.
  6. Explained the stations.  The pi bee contestants had to do a lot of hard work – so they were allowed to do a little bit of the stations and played the pie face game the rest of the time.
  7. We switched between stations every 10-15 minutes.
  8. The end!  Some students helped clean up and we were good to go!

That was it!  We all had a blast – now go start planning for Pi Day!

Star Wars Crawl for the Classroom

Star Wars: The Last Jedi is coming in December!!!  Why not give the students instructions on a Star Wars crawl instead of a Powerpoint presentation?  Or embed this into Google Classroom!

Last week, I set up a Breakout game for the students where they had to use mathematics to solve puzzles in order to open the box.  Now the game included a Powerpoint with a cheesy little story about the Dentist.  I didn’t want to do the dentist story.  It seemed far fetched.  Okay okay, Star Wars is far fetched, too…..

I have a Princess Leia wig… and costume…

and why can’t I have a video give the students instructions?

(photo credit: Star Words on Google Play)

So here is one example!  You could use this to give an exit ticket at the end of class.  You could use the video to give instructions for a lesson.  You can add whatever text you want!  Need a fun way to give announcements?  Write them in Star Words!

Here is how I created the video:

  1.  Downloaded the “Star Words” app onto my phone.
  2. Used the editor to write the text.
  3. Played the video until it was just the way I wanted it.
  4. The app has a record option.  Warning!!  Everything gets recorded!!!  You sneeze, you hiccup, birds tweet, everything.  So make sure it is quiet.
  5. Once recorded, it was stored in my Internal Storage under “Videos”.  From there I shared it with my Google Drive.
  6. Once on my drive, I downloaded the mp4 file to my laptop at school.  The drive doesn’t like mp4 files and was not playing them right until I downloaded the original file.
  7. I embedded this file into my Powerpoint presentation and had to make two movies because I teach at two different schools.  You wouldn’t have to do this extra step.  It just makes the flow easier.  I don’t like stopping class to pull something up when I can embed it once and use the presentation year after year.


Breakout EDU – Education’s Escape Room

Wow!  I had heard of Breakout EDU before but to actually start one in class was really amazing!  There are quite a few things I learned along the way and I probably have many more things to learn.  Here are my reflections, education standards, sources of materials and steps I used to do this particular game which could apply other games.

First, I notice that they suggest whole class sizes and I see videos with classes given the puzzle.  I am not sure this is the best way to go about it.  There are only so many things you can do with the clues once everyone has gathered the evidence.  While watching the videos I noticed how some people would hang out in the back and not participate or after gathering the clues some of them had nothing to do.  I am sure some breakout games could work around this with more small lock boxes and more clues.

(Source: Breakout EDU.com)

Like most times when flipping the classroom, I put a LOT of time into it beforehand and then just aid the students through the game.  It is HARD not giving them hints and watching them fail and go back.  Oh my goodness!  Since changing my teaching strategy from what I used to do, it really is harder but the kids eyes light up like crazy when they get it.

Reflection:  All of us reflected on the game at the end.  The game timer of 45 minutes gives us 10 minutes to discuss:  how did we work in a group?  Were you a leader or did we all lead at different times?  Why did we make that mistake and how can we fix it next time?  So for example one student solved a clue by clicking on the eye of the Statue of Liberty.  She didn’t tell anyone though that she did this.  So the other students were looking for clues relating to the eyes of the Statue of Liberty for a good chunk of time.  So we discussed how next time clues or problems could be posted on the dry erase board.  This is really important when you have larger groups of students.

Standards:  How and what standards did I use?  I used this in the gifted class at my school for 6th grade.  We are working this quarter on Divergent Thinking, developing fluency in our ideas, flexibility in our solutions and elaborating.  They need to learn how to organize their creative thoughts and find connections between ideas.  This type of escape room is a microcosm for exercising the 4 main 21st century skills that students need:

  • Collaboration and teamwork.
  • Creativity and imagination.
  • Critical thinking.
  • Problem solving.**This game and everything listed will work in other classrooms as well!  This just happens to be the class I am teaching at the time.  To modify it for a regular classroom, I would choose a game at their level (this one was for middle school/high school) and the appropriate amount of students listed on the game or what you think your students need.   I chose a game a little above their age and used fewer players**

Step One:  Buy a Breakout EDU box or make your own.  You can purchase the locks at Amazon and the hardware store.  The number locks, directional lock and alpha lock are the key to many of the games’ puzzle.  A black light marker and black light flashlight were also used in the game.  You want to make sure the marker is invisible in normal light.

The USB drive that came with the box did’t work for me.  I used my own which was nice because it twists and added a little “twist” to solving the puzzle.  This was simply because I used to own a company and put my client’s photographs on custom made USB drives.

(Photo from Breakout EDU)

Step Two:  Create your own game or find one already created for you on the website.  I wanted to follow one first in order to be able to manipulate it later for my own needs.

Dr. Johnson’s Lab is part of the Breakout EDU so you need to purchase a kit to have access to the games.

You can also find games online and on Teachers Pay Teachers.  When doing a search, also try the term “escape room.”

Here is the set up video.

I noticed that the set up video skips the other lockbox with the Delta Airlines code on it.  Since this was my first time doing a Breakout EDU I left it out as well.  I think it would have and could have been included seamlessly into the game.  I have a small class size and this removal worked well with me.  If I had more  students, then this part would have been included.

Step Three:

Print everything out.  Mark and cut and get your items created.  So, for Dr. Johnson’s lab I had to print out just 3 or 4 sheets of paper.  The rest were colored arrows vital to the game.  Since I don’t have a colored printer, I just drew them and colored them myself.

Here are Printables for the end of the game.

Step Four:

Set all of the locks.  There is handy tutorial on how to do this.

Tutorial

Video for Letter Lock

Video for Number Lock

Add something fun inside the box!!  I printed out the printables, a pretend vial of the antidote and also included some Hershey Kisses in the box. The kids went nuts!

Step Five:

You need to set up the room before the students enter.  I set it up at the beginning  of the day.  Nobody noticed the extra items much.  I drew the breakout symbol with the arrow on small sticky notes and put those on the Breakout clues.  That way they could tell it was a clue versus not a clue.  You also need a computer for the kids to use.  I borrowed a Chromebook from another teacher or let the students use my computer.  Letting my students use my computer was fine except we couldn’t see the timer sometimes.

Step Six:

Set up your computer and play!
I have the Breakout Facilitator Slideshow up for introducing our game.
I have the Youtube video with the crazy mad scientist to introduce the game.
Finally, I have the Breakout timer running on another tab.