Smoothies and Ratios


This Fun Friday was a LOT of fun!!  I asked the parents 2 weeks ago via Sign Up Genius to buy one food item.  The parents were happy to help contribute and I ended up with plenty of supplies.  On the day of smoothie making, I provided my huge Ikea smoothie straws, blender, vanilla and oats.

My morning class made these in the teacher’s lounge since lunchtime was far away.  It was handy to have the space and sink. My afternoon class stayed in the classroom and it still worked out well.  I made sure to have lots of napkins, wet washcloths and a disposable tablecloth (or the trash can liner works well in a pinch too!).

  1.  After our morning warm-up and Brain Pop video, the students had to get into groups of 2 or 3 and choose a smoothie recipe from the handout.

**One change I would make to the handout is that you need ice.  Smoothies taste better cold and I added a cup of ice cubes to each recipe to make it colder. **

2.  Once they picked a recipe, I gave the students *part* of the new recipe.  So for recipe #4, I gave one group 2 and a half bananas.  So they had to figure out the rest of the recipe based on that proportion.  Of course you can do this two ways:  cross multiply and divide or find the ratio.  Some students figured this out intuitively and others took a little longer.

One group received 5 strawberries instead of 4.  They figured out they needed to multiply all of their ingredients by one constant (which is faster than cross multiply and divide) – I never told them this!  It was amazing!

Star Wars Crawl for the Classroom

Star Wars: The Last Jedi is coming in December!!!  Why not give the students instructions on a Star Wars crawl instead of a Powerpoint presentation?  Or embed this into Google Classroom!

Last week, I set up a Breakout game for the students where they had to use mathematics to solve puzzles in order to open the box.  Now the game included a Powerpoint with a cheesy little story about the Dentist.  I didn’t want to do the dentist story.  It seemed far fetched.  Okay okay, Star Wars is far fetched, too…..

I have a Princess Leia wig… and costume…

and why can’t I have a video give the students instructions?

(photo credit: Star Words on Google Play)

So here is one example!  You could use this to give an exit ticket at the end of class.  You could use the video to give instructions for a lesson.  You can add whatever text you want!  Need a fun way to give announcements?  Write them in Star Words!

Here is how I created the video:

  1.  Downloaded the “Star Words” app onto my phone.
  2. Used the editor to write the text.
  3. Played the video until it was just the way I wanted it.
  4. The app has a record option.  Warning!!  Everything gets recorded!!!  You sneeze, you hiccup, birds tweet, everything.  So make sure it is quiet.
  5. Once recorded, it was stored in my Internal Storage under “Videos”.  From there I shared it with my Google Drive.
  6. Once on my drive, I downloaded the mp4 file to my laptop at school.  The drive doesn’t like mp4 files and was not playing them right until I downloaded the original file.
  7. I embedded this file into my Powerpoint presentation and had to make two movies because I teach at two different schools.  You wouldn’t have to do this extra step.  It just makes the flow easier.  I don’t like stopping class to pull something up when I can embed it once and use the presentation year after year.


Reward the Good Questions Not the Good Answers


I currently teach the 6th grade  accelerated math (known in other schools has honors) class and gifted education.  After 10 years of parenting and reflection into my prior teaching practices, I came to the conclusion to add a candy jar but not for giving me the right answers.  Students can earn a treat for asking a good question.  It must be a question that requires more research, more reasoning, more discussion and not a question that can be answered by a simple google search.

Our greatest accomplishments started with a “what if?”   — What if we could land on the moon?  What if phones could go on the internet like computers?  These accomplishments started with good questions, not good answers.

Sometimes the good answers even hinder what we can accomplish.  Andrew Wiles solved Fermat’s last theorem but the answer was wrong at first.  He didn’t give up and stop asking questions.  He did solve it after his first presentation.  In 2017, an 11 year old developed a better and cheaper way of detecting lead in the water.  We had an answer already to lead detection and scientists have been detecting lead in the water for years. But she kept asking questions – is there a better way?  Is there a cheaper way?  And that is how she invented a new lead detection device that works over bluetooth that is cheaper and more convenient than current methods.

When your child gets home from school or students enter your classroom, ask for the good questions.  Ask them what good questions they asked today.  Not what they got right.

Brain Walks with Juliana

My daughter creates lessons and has been doing so off and on for two years.  I decided that I just had to tape this one and share her “Brain Walk” with everyone.  Who wouldn’t want to go on a brain walk??  Sounds like fun!  And we all need the exercise.

Can we use this lesson anywhere else?

What can a just turned 7 year old teach us about solving problems?

Do we have all the answers and do we need to?

What may help us reach the answers we desire?

Breakout EDU – Education’s Escape Room

Wow!  I had heard of Breakout EDU before but to actually start one in class was really amazing!  There are quite a few things I learned along the way and I probably have many more things to learn.  Here are my reflections, education standards, sources of materials and steps I used to do this particular game which could apply other games.

First, I notice that they suggest whole class sizes and I see videos with classes given the puzzle.  I am not sure this is the best way to go about it.  There are only so many things you can do with the clues once everyone has gathered the evidence.  While watching the videos I noticed how some people would hang out in the back and not participate or after gathering the clues some of them had nothing to do.  I am sure some breakout games could work around this with more small lock boxes and more clues.

(Source: Breakout EDU.com)

Like most times when flipping the classroom, I put a LOT of time into it beforehand and then just aid the students through the game.  It is HARD not giving them hints and watching them fail and go back.  Oh my goodness!  Since changing my teaching strategy from what I used to do, it really is harder but the kids eyes light up like crazy when they get it.

Reflection:  All of us reflected on the game at the end.  The game timer of 45 minutes gives us 10 minutes to discuss:  how did we work in a group?  Were you a leader or did we all lead at different times?  Why did we make that mistake and how can we fix it next time?  So for example one student solved a clue by clicking on the eye of the Statue of Liberty.  She didn’t tell anyone though that she did this.  So the other students were looking for clues relating to the eyes of the Statue of Liberty for a good chunk of time.  So we discussed how next time clues or problems could be posted on the dry erase board.  This is really important when you have larger groups of students.

Standards:  How and what standards did I use?  I used this in the gifted class at my school for 6th grade.  We are working this quarter on Divergent Thinking, developing fluency in our ideas, flexibility in our solutions and elaborating.  They need to learn how to organize their creative thoughts and find connections between ideas.  This type of escape room is a microcosm for exercising the 4 main 21st century skills that students need:

  • Collaboration and teamwork.
  • Creativity and imagination.
  • Critical thinking.
  • Problem solving.**This game and everything listed will work in other classrooms as well!  This just happens to be the class I am teaching at the time.  To modify it for a regular classroom, I would choose a game at their level (this one was for middle school/high school) and the appropriate amount of students listed on the game or what you think your students need.   I chose a game a little above their age and used fewer players**

Step One:  Buy a Breakout EDU box or make your own.  You can purchase the locks at Amazon and the hardware store.  The number locks, directional lock and alpha lock are the key to many of the games’ puzzle.  A black light marker and black light flashlight were also used in the game.  You want to make sure the marker is invisible in normal light.

The USB drive that came with the box did’t work for me.  I used my own which was nice because it twists and added a little “twist” to solving the puzzle.  This was simply because I used to own a company and put my client’s photographs on custom made USB drives.

(Photo from Breakout EDU)

Step Two:  Create your own game or find one already created for you on the website.  I wanted to follow one first in order to be able to manipulate it later for my own needs.

Dr. Johnson’s Lab is part of the Breakout EDU so you need to purchase a kit to have access to the games.

You can also find games online and on Teachers Pay Teachers.  When doing a search, also try the term “escape room.”

Here is the set up video.

I noticed that the set up video skips the other lockbox with the Delta Airlines code on it.  Since this was my first time doing a Breakout EDU I left it out as well.  I think it would have and could have been included seamlessly into the game.  I have a small class size and this removal worked well with me.  If I had more  students, then this part would have been included.

Step Three:

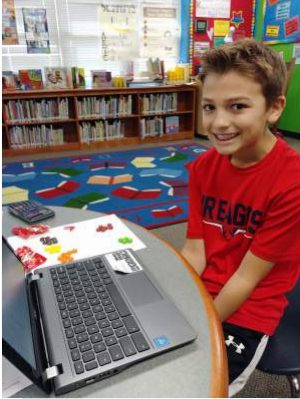
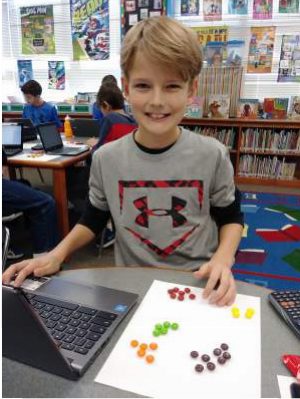
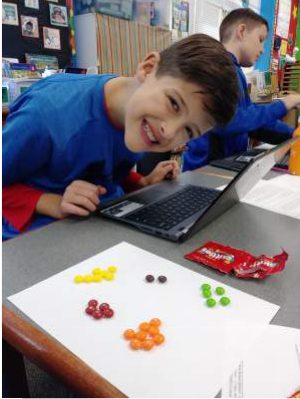
Print everything out.  Mark and cut and get your items created.  So, for Dr. Johnson’s lab I had to print out just 3 or 4 sheets of paper.  The rest were colored arrows vital to the game.  Since I don’t have a colored printer, I just drew them and colored them myself.

Here are Printables for the end of the game.

Step Four:

Set all of the locks.  There is handy tutorial on how to do this.

Tutorial

Video for Letter Lock

Video for Number Lock

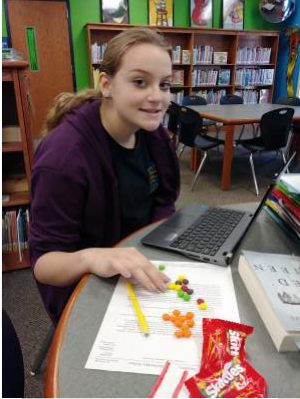
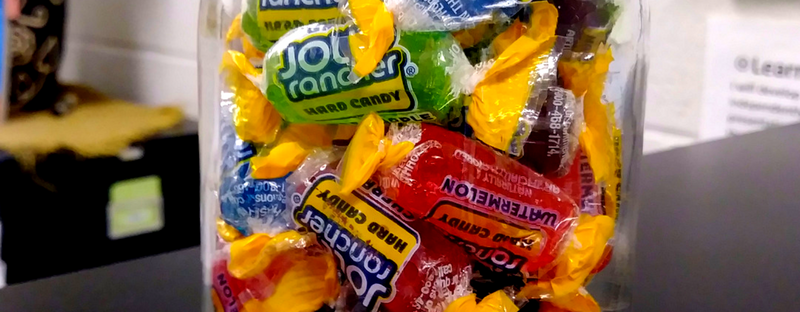
Add something fun inside the box!!  I printed out the printables, a pretend vial of the antidote and also included some Hershey Kisses in the box. The kids went nuts!

Step Five:

You need to set up the room before the students enter.  I set it up at the beginning  of the day.  Nobody noticed the extra items much.  I drew the breakout symbol with the arrow on small sticky notes and put those on the Breakout clues.  That way they could tell it was a clue versus not a clue.  You also need a computer for the kids to use.  I borrowed a Chromebook from another teacher or let the students use my computer.  Letting my students use my computer was fine except we couldn’t see the timer sometimes.

Step Six:

Set up your computer and play!
I have the Breakout Facilitator Slideshow up for introducing our game.
I have the Youtube video with the crazy mad scientist to introduce the game.
Finally, I have the Breakout timer running on another tab.


Certified Kind Classroom

(source: Amazon)

I read “Wonder” by RJ Palaccio soon after it was released – it ended up being one of my favorite books.  Then, I read it with our book club and everyone really enjoyed it!  THEN, I read the book to my 4th grade class last Fall.  Whew!  Needless to say, I still love the book and encourage everyone to read it.  I like the shift in points of view and the themes in particular.  Now the movie is coming out November 17, 2017!  Woo hoo!  If you want to read the book at the library reserve it NOW!  I am sure it will be a long list in November.

Certified Kind Classroom Project

Not only is it an awesome book, but Lionsgate is starting a Certified Kind Classroom that my class will be participating in.  There are activities AND prizes.  Who doesn’t love prizes??  The first activity is one I have wanted to do with a classroom for a long time – design our own t-shirt.  With new and cheaper methods of creating shirts I thought this would be fun.  Now the Certified Kind Classroom makes it into a contest.  So not only do we get to use creativity and communication skills – we get to apply them and compete.

The second activity is identifying precepts to live by.  Personally, I think many books and discussions have missed an underlying message:  Priorities.  What ARE our priorities??  Young people are trying to identify their priorities.  They usually adopt their parents’ priorities, sometimes try ones of their own and then – hopefully – develop a system of their own moral, ethical, physical and academic priorities.  In the most famous precept in the book (which is actually from Peter Pan by Barrie I believe) , the teacher states “It is better to be kind than to be right.”  What does that mean?  What do we take away and how do we put this into practice?

The third activity is one I have seen in a few schools.  Some call it filling a bucket.  Some call it fishing for good behavior.  Some call it “random acts of kindness.”  Whatever it is – the continuous action of calling attention to good behavior and acts of kindness is something that is worth doing!

Solar Eclipse 2017 – Activities and Resources

Wow!  Of all the years to return back to teaching!  We will view a solar eclipse on the THIRD day of school.  How amazing is that???  I am SO excited about the solar eclipse.  It brings me back to elementary school days and writing reports on the planets and high school when I would tape “Star Trek: The Next Generation” to watch it later.  (I will explain what a “tape” is to you youngin’s in another post!)

I decided to make each day up to the eclipse all about solar activities!  For the first day, we will make Solar Ovens.  Then, we will take them outside and put together our s’mores powered by the sun!

#1

To Make Solar S’mores:

You will need: marshmallows, graham crackers, milk chocolate (the Hershey plain bar is peanut free unless they have changed it, foil and a cardboard box, glue or tape, clear plastic wrap, ruler and black construction paper

Optional but fun: a thermometer to see how hot the solar oven gets.

Steven Spangler does a great video on how- to.  I read it will take about 30 minutes to melt the marshmallows.

You can variations of the solar oven and see which works best.  Black paper?  White paper?  Foil? A large box?  A small box?

You can discuss the greenhouse effect and how it relates to your own home just like the solar oven.

#2

Astronomy Magazine has published a couple of articles on the Solar Eclipse that are super interesting.  “19 Big Eclipse Surprises” by Michael Bakich is in the July 2017 issue.  “Solar Eclipse Geometry” is in the May 2017 issue.

25 Facts about the Eclipse in Astronomy Magazine

Students can take parts of these articles and summarize them using Jigsaw.

#3

NASA has put together a 44 page Activity Guide full of ideas here.


#4

(Image source: Amazon)

The librarians in our district published a book about the eclipse!  You can purchase it on Amazon here.  It has ALL 5 star reviews and written FOR elementary students by two librarians who work in an elementary school in Missouri.

#5 – Pinhole Viewer

Make a pinhole camera to view the eclipse.

Here is another set of directions using a cereal box!


#6

When discussing circles, you can always count on pi.  Especially lemon meringue.

The Jet Propulsion Lab has a lesson on pi with reference to the eclipse and pi.  We have all seen the map of the solar eclipse path – but how did scientists figure that out?  The JPL has this math illustrated in #4 of their “Pi in the Sky” lesson series.

Pi in the Sky 4

#7

NASA Downloadable Activities

#8

Department of Natural Resources – Download Lessons and Activities

#9

NASA Eclipse Kit

#10

Great tips!!

These are great tips for viewing the eclipse if you are in the viewing area like I am.  Bathroom break – GREAT tip.  You don’t want you and/or your students to miss this!

As a photographer, I particularly find #24 and #25 quite funny!  But seriously, I did research photographing the eclipse and came to the conclusion – just don’t.

Creativity

I was assigned to create a lesson using the four foundations of creativity.  They are:  Fluency, Flexibility, Originality and Elaboration.  Since my unit plan for my final will utilize heavily with electric circuits, I decided to create a Creativity Lesson on Electric Circuits.

Assignment 9 Riley

In previous lessons, I have had students take ordinary objects and imagine that they are 2500 years into the future.  How would an archaeologist see this object?  This train of thought leads into our scientific methods and certainty regarding real archaeological digs such as Egyptian.

Another idea I have seen using creativity is animals.  List all the animals you can think of.  Think of their characteristics that you like.  Try combining 2 or 3 animals into one super fun ultimate animal!  These are so fun to see drawn and colored on paper around the classroom or hallways.

The Quiet Majority: Introversion and Gifted Students

My paper due this week asked for a topic on Affective Needs.  Among the list was “introversion” which intrigued me for several reasons.  One, statistically most gifted students are introverts.  Two, I am an extrovert and believed that this topic would really wide my point of view of how these students.

The books I read for the paper were VERY helpful and well-written.  I highly would recommend them to anyone who interacts with the public on a daily basis or has a child that is an introvert.  If you need a summer reading book and teach or parent children, I would highly recommend them.

Here is a link to my paper on Introversion.  Since the class is for teaching Gifted Education, it leans towards that population but many of the introverted tips and characteristics of course will apply to all children.

IntroversionandGiftedStudents

Quiet:  The Power of introverts in a World That Can’t Stop Talking by Susan Cain

This book is her first and more towards adults and children.

Quiet:  The Secret Strengths of Introverted Kids by Susan Cain

This book is excellent and geared specifically towards building strengths instead of tearing kids down.

Introvert Power: Why Your Inner Life Is Your Hidden Strength by [Helgoe, Laurie A]

Introvert Power:  Why Your Inner Life is Your Hidden Strength  by Laurie Helgoe

The Hidden Gifts of the Introverted Child: Helping Your Child Thrive in an Extroverted World by [Laney, Marti Olsen]

The Hidden Gifts of the Introverted Child:  Helping Your Child Thrive in an Extroverted World by Marti Olsen Laney

This book was published in 2015 and very to date and the conversational writing style makes it easy to follow.

(Photo Credit for the Book Covers: Amazon)